index
index index
RV Maintenance
My Stove as an RV Heater


THE NEED FOR AN ALTERNATE HEATING SOURCE

There had been little sun for days, just fog and rain. On the second night of near freezing temperatures, I could see we had a problem. I only have one battery, and it had never been adequately recharged with no direct sun. In the dismail rain, ambient light could only muster a little over one amp: that equates to only about 10 amp-hours a day. That furnace of mine is eating up 30 amp-hours a day! It does not take a rocket scientist to predict a fast approaching cold future. My one battery is an old 100 amphour battery that is almost depleted of all reserves.
After a day of miniscule charging it is at 12.4 volts. Just pitiful! At midnight it is 11.9 volts: almost completely dead. In desperation, I turned off the furnace. A deliberate and necessary act, because we can not loose "water". Specifically, we can not loose the bathroom! The bathroom needs water. Every thing now is reserved to the water pump, and it now has top priority untill day break.

And I informed my wife that there was going to have to be lot more cuddling in her future due to the situation... RULERMAR.GIF, 1 kB The problem:

BANASTAR.gif, 1.5kB You, LORD, are my lamp; the LORD turns my darkness into light.
2 Samuel 22:29
The furnace is using too much electricity: 7.5 amps. And when nights are cold and the days have no hope of sunshine, I needed an efficient and safe alternate source of heat.

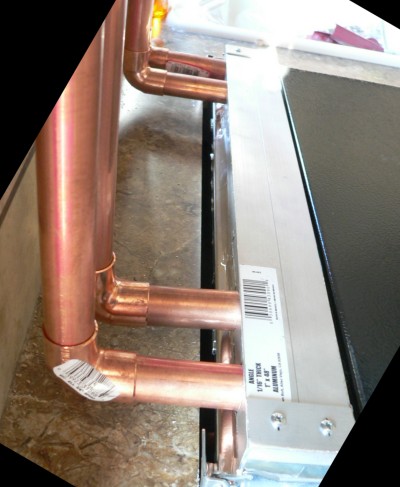
I decided to vent the oven gasses from the stove to the outside, and in the process use copper tubes and the top stove vent as heat exchangers.


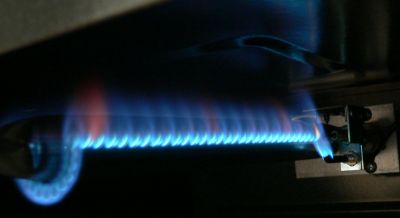
StoveFlame.jpg, 8 kB
The hard points to consider are to not restrict air flow. Other wise deadly carbon monoxide could be produced. Even though all gasses are safely vented to the outside, inefficient combustion is to be avoided at all times just on general principal. It is stuped to even mess around with this possibility! After all, the damper could accidently be closed or something.

Also, another consideration: I do not want the stove permanently modified: I do not want any holes drilled into it. All of the modifications to the stove and it's vent must be superficial. To my knowledge, no one has done this before - at least not still living people.

And thirdly, the oven and top burners will still function as before. Functionality can not be lost, including the hood vent.


StoveBackB.jpg, 43kB
The idea is to vent oven gasses to the hood vent.
Stove-Silicone.jpg, 27 kB
After the aluminum flashing is rough cut. I must determine exactly where the edges of the metal are messing with the top surface. A gas tight fit is required to have no carbon dioxide, water, or carbon monoxide escaping into the RV. To do this I apply silicon2 all around the edges, and then gently place Syran Wrap or Cling Wrap over the still wet silicone. I obtain an impression when the stove top is placed on top. Give it a day to cure then remove the top and the syran wrap. Observe the flat spots. That is where it is touching ok. Reapply untill all areas of the lip are touching. Then switch to High temp silicone and reapply. Then use high temp tape on the walls, fitting to the established lip contour.
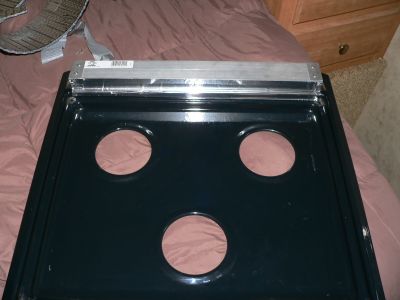
StoveTop-Manifold.jpg, 16 kB
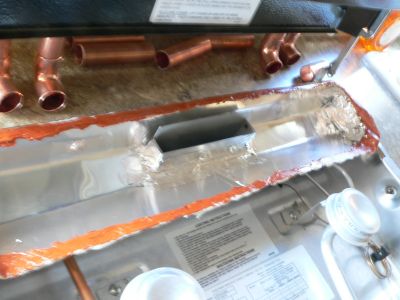
Two one inch aluminum angle pieces are placed together to form a two inch channel. The aluminum manifold is placed on top of the stove over all the oven vent slots.
The aluminum manifold is sealed with reflectix heat tape. This tape is quite strong and also has a good grip. The tape holds it in place.

Four holes are drilled in the manifold to accommodate the four copper tubes.
Silicone2-400F.JPG, 13 kB
Silicone is good to 400F degrees.
Silicone-CopperTop-700F.JPG, 16 kB
High Temp Silicone is good to 700F degrees.
StovePipes-45.JPG, 21 kB

StoveSpecs-7100.JPG, 43 kB
7100 BTU/Hr for the oven.

I can get aprox 95% efficiency with a "room-temperature" measured at the exhaust.
And it consumes no electricity!
In contrast, the Furnace is only 70% efficient, and uses a big 20000 BTUs/Hr.

I love the Furnace: the way it mixes the air, the way it heats the floor, and the speed at which it warms the place. Therefore, the oven-heater will be only a supplemental heat source, and a low output emergency source.
StoveTop-Manifold.jpg, 16 kB

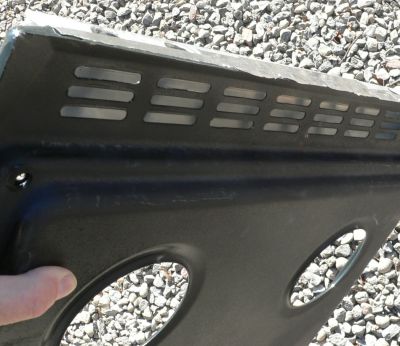
StoveUnderGrill.jpg, 29 kB
Here is the underside of the stove top. Gases flow up through the slots and into my manifold.
StoveUnderManifold.jpg, 22 kB
It took a week, each day adding a little more silicone and saran wrap to make more of the form.


The four tubes are directly vented above the hood vent, into the duct to the outside. The outside vent door is held open with a clip, and does not depend on the fan for its operation. The travel trailer is so airtight that we need more ventilation anyway. Of course, if we are cooking we use the fan for added air flow.


RULERMAR.GIF, 1.6kB
StoveHoodExten.jpg, 26kB
Another modification...
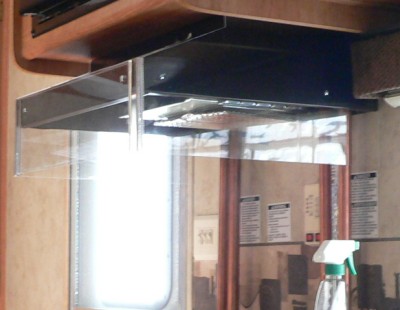
Had to add a hood extension, made of clear plexiglass. When cooking fish, odors are more easily vented to the outside with the hood extension. It forms a border about 4 inches wide. I removed the flapper door of the vent, so that all operations are not dependent on quantity of airflow.

I do not like smelling burnt gas, which is CO2. CO2 is kind of odorless, and makes the air smell (or feel) "stale". But you can really smell cooking odors. Cooking odors can permeate blinds, clothes, and carpets. This happens to other RVs, but not mine: My RV smells just as clean as the day it was new.

When using the oven for broiling the vent filter may be left open with this hood extension. However, if the oven is being used for heat then the filter is closed off. In this case, spent gases are vented directly to the outside, instead of lingering under the hood. You do not want to breath bad air in an inclosed space; It gives me a real headache. The vent filter is closed off with a piece of reflectix, as is shown in the picture.

When I am cooking with low heat, as when boiling a couple of eggs, the spent gas is quite well vented to the outside naturally, without the vent fan being on. But when I am removing lids for inspection or stirring, I use the fan. It makes fast work of rising steam and odors, although it is very loud.

It is always windy along the coast, and wind hitting the right side of the trailer can sometimes reak havoc and simply require the fan to be on. In contrast, wind from the left actually creates a vacuum on the right side, and sucks out cooking air without using the fan. Be sure to crack open a window that is on the windward side, or open slightly the bathroom ceiling vent.
RULERYEL.GIF, 4.2kB There never has been, nor ever will be, any cooking odors in my RV. Nor, do I want to breathe spent stale CO2 gas from the stove top burners or the oven. I like "fresh".

This stove hood fan has always been an aggravation in the back of my mind. Obscure, but decidedly something that I don't like. But now it has received my direct attention, and clearly something needs be done. The fan is in focus: It is loud and obnoxious. It consumes more power than is necessary, especially if I leave it on for an hour of cooking. I always have to turn it off, only to later turn it back on to lift a lid.

Rheostat.jpg, 30kB
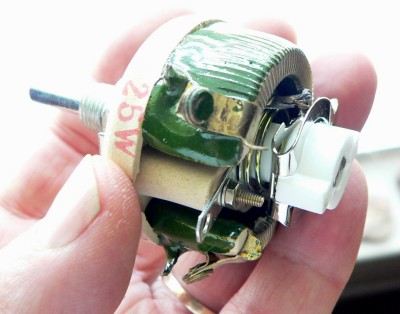
The Hood Fan takes 1.5 Amps at 13.5 volts. That is about 9 ohms, and 20.25 Watts. A rheostat of 9 ohms would be 1/2 speed, and a rheostat of 27 ohms would be 1/4 speed, at the far end. I would like about 1/4 speed to be mid-pot (27 ohms, assuming linear taper). So, far-end would be double that, or 54 ohms. So, a standard rheostat value near this target would be 50 ohms.

A brand new pot arrived from Amazon...
The pot is 50 ohms, just what I ordered. Rheostat is 25 watts. I require half that in a worst case scenario (which occurs at 1/2 speed, or 9 ohms), so this is fine.


I cut the line going to the fan, and drilled a half inch hole in the stove hood, and installed the rheostat. Took less than 5 minutes.
Works great! Whisper quiet! I can now leave it on for the entire cooking session. And I can adjust to any speed. Perfect! Simple solution! Simple!

Well, not so simple...
Yes, this is a simple mechanical thing, and simple is to be desired. But the cooking environment threatens my simple toy: There will be lots of steam hitting this pot, from vegetables and meats. Burning gas will produce lots of hot water vapor from combustion. Cooking grease is going to coat the windings, not to mention assorted splatters. And then dirt is going to stick to this residue. How will this affect my rheostat?

I have been an Electrical Engineer for 35 years and have seen lots of rheostats. And I know for sure that I will be spending more time cleaning my rheostat than cooking! So here is what must be done...
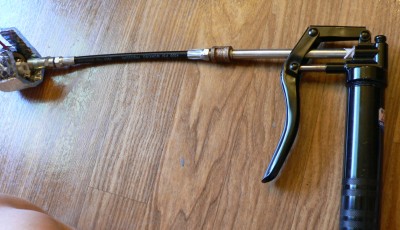
Ryeo-Grease.jpg, 30kB Ryeo-Grease56.jpg, 50kB Apply grease

Ryeo-Grease60.jpg, 18kB Inclosed and sealed.
Three things must be done:
First is to solder wire pigtails onto the posts. Because in the next steps, you will loose access to the inside of the rheostat.

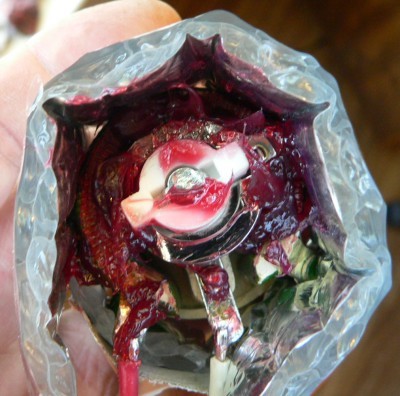
Second is to apply liberal amounts of a water repellant grease. Apply on everything that may corrode. After the grease is coated in between the windings, I also apply two drops of synthetic oil right on the windings. The object is to prevent moisture from coming into contact with any metals, especially microscopic powder from friction. Most abrasion particles, except for silver, I have found, will become insulating contaminants. These contaminants will then have to be removed by cleaning. To prevent this, grease can be applied as a boundary layer.

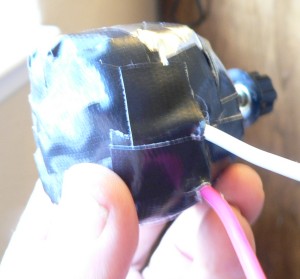
Third, is to inclose the rheostat to protect from non locally generated contaminants. This is mainly dust which would otherwise stick to the grease. I made this one out of plastics, cardboard, and tape. Don't use Duct Tape, use Gorilla Tape. Mine is not too pretty, but it works great.

A well maintained rheostat should never arc because two or more windings are always in contact with the brush at all times. But - if they do arc - microscopic hot spots will burn contaminates into and onto the windings. This will promote further electrical "scratchiness". Cleaning will not help much, and the windings will have to be burnished.


ChickenHead.jpg, 22kB Pretty nob
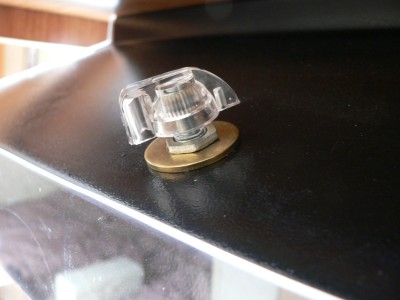
Found a pretty nob: a clear "ChickenHead nob". It gives a better indication, in feel and sight, of how fast is the fan turning. Can't always hear it.


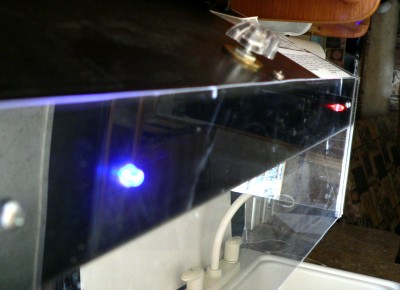
Hood-Lights.jpg, 26kB Hood indicators RGB: 5,000mcd, 5v, 0.2w, 30deg Blinking Red: 0.2 Lumen, 2000mcd, 0.175 Watts, 10v
I accidently left the hood fan running all day. I knew it was going to happen, it is too easy to do. On the low settings with just enough draft to do the job, I can not hear it. On low, it is not using much current; That is not the problem. It simply does not need to be on!

So here is the solution:
Installed two Hi Intensity LEDs, one on each side of the hood. Drilling through the plastic must be done with care, using a sharp bit and little pressure. The LED on the right is a Blinking Red, and the one on the left is a RGB Changing Multicolor. Something has to draw my attention to the fact that either the hood fan is on or the hood lights are on. That fan can be super quiet. Also, it is a pretty way to do it.


RULERMAR.GIF, 1.6kB


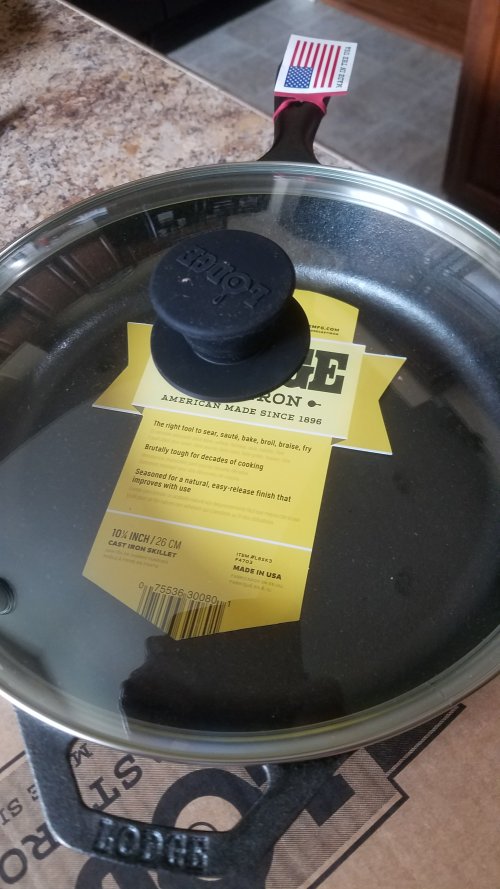
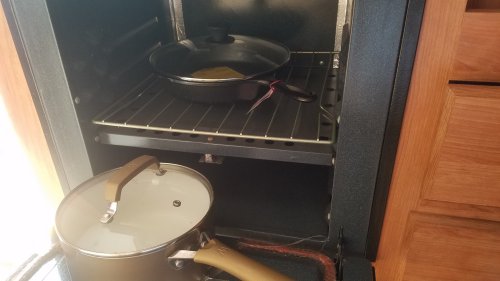
The oven is also a storage space. In an RV, every space has a purpose, and everything has a space. This is where my pot and a skillet go. Lodge-20180806_140311.jpg, 78kB Originally, before I rediscovered Cast Iron, I had tried modern pots, like Ceramic. But discovered that they leach Aluminum from their rims. Seems to be a problem and health concern of all Ceramic pots and pans. So, I switched back to Cast Iron like my Mom used. No food has ever tasted better than what was cooked in my Mom's Cast Iron. I did not intend to buy Lodge, but I made the mistake of only looking on Amazon. Amazon does not cover better brands such as Field, and StarGazer. Lodge is too heavy for an RV, about 8 pounds including a lid. Modern skillets are only a couple of pounds. The weight part is great, but modern skillets can not be used due to health concerns.
BBALLRED.GIF, 156B Teflon is highly toxic especially in fumes, but also in digested particulate.
BBALLRED.GIF, 156B Stainless contains Nickel, even in "food grade".
BBALLRED.GIF, 156B And Ceramic has exposed aluminum areas, and also cracks and chips exposing aluminum.

And no modern skillet, after a month of usage, can match a seasoned Cast Iron for nonstick of any age. Cast suffers no degradation with time. But a big con is that tomato and acids can remove the Metal Seasoning.


Pot-20180806_143536.jpg, 22kB I was worried that it would not fit. It has to fit in the oven for storage. In an RV, SPACE is sacred. Every inch. The oven is 15.5 inches by 15.5 inches: it fits OK. The old pan is not a skillet. I think it is classified as a "pan". Although, I cook eggs and potatoes in it as if it were a skillet. Everything goes back to what an RV is: Every thing has a space, and everything has AT LEAST ONE usage, preferable more. In this case, I can also make stir-fry. But there are problems:
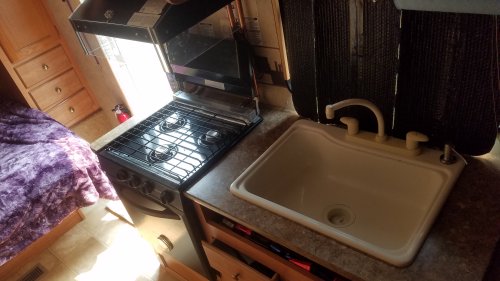

POT-20180806_143940.jpg, 31kB The CENTER of a ten inch skillet must fit directly over a burner. It does; just barely. But I still feel, without knowing, that a ten inch is too big for this small stove. But, if I am really hungry, more hungry than 10 inches, I can live with it. The other problem is that cast holds a lot of heat, and that sink that you see there, is PLASTIC. If I have any brains, I will not be just throwing that kind of a hot skillet into the sink. If I forget, the sink may no longer hold water. One solution, it would cost more money, but I could replace the sink with stainless. That brings me to another problem: weight. A stainless sink will weigh more than this plastic one. Remember, this is an RV. And... Did I mention the skillet weighs a ton, with lid, about 8 pounds?

Weight is a problem in an RV. I am going to take two skillets: one a 10 inch Lodge, and one a 10 inch StarGazer.
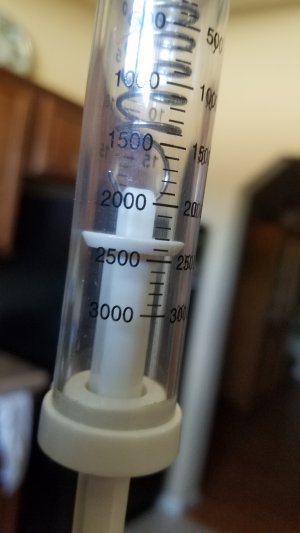
LodgeWeight.jpg, 22kB Here is the weight of the Lodge on a Suspension scale. 2320 grams is 5.114 lbs for the Lodge. Yes, that is heavy! I do not really want to use it in an RV.
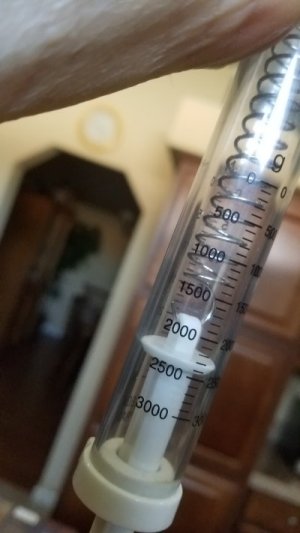
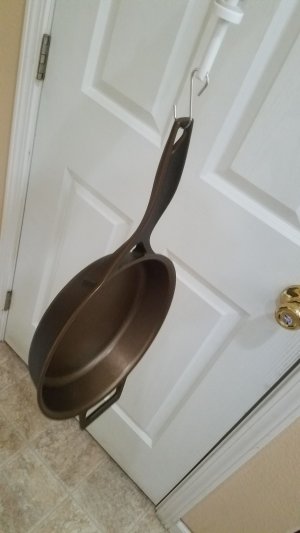
SkyWeight.jpg, 24kB StarHang.jpg, 20kB The StarGazer measures the same: 5.1 lbs.
The StarGazer claims to be one pound lighter than the Lodge, but as you can see - a total lie.
Here is an American company resorting to false advertizing.
Another bit of false advertising on the part of StarGazer was the depth of the pan. They reported 19.4, 10.5, 3.3. I assumed I was going to get a 3.3 inch pan that, with higher sides, could be used for stir fry. No! The pan is only 2 inches deep!

As a result, I have two skillets. Neither one practical. That will always be the danger of buying from the Internet: You can not "experience" the skillet. You can not feel with your hands nor see with your eyes. Instead, you can legally, or illegally, be deceived by words. It is fair practice, or at least accepted, to mislead. It is all in the "spin" and in the coloration, and it is called advertizing. ...Or, maybe I am just getting stupid, assuming and gullible.


Pot-20180806_145032.jpg, 13kB There are actions of others that go beyond misleading - They can hurt you!
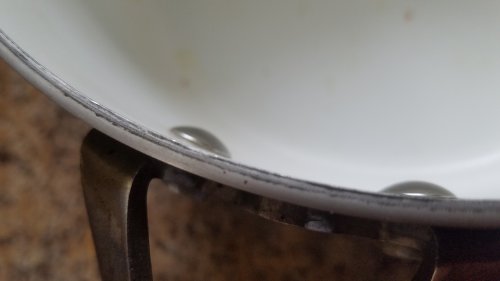
Here is how you can be poisoned by Ceramic.

This is my newest modern pot: CERAMIC! (It is on its way out to the garbage can if I haven't mentioned it.) This started tasting bad, when I would take the woofers out to Black Butte. I know what aluminum tastes like, I can taste it if restaurant cooks cook my cabbage in big aluminum pots. The cabbage tastes like boiled swamp water. It is bad! Now you can see EXPOSED aluminum on the edge of this ceramic pot. And I think it is the same for Titanium. I have looked on the Internet; Other ceramics pots have the same problems and health issues. If you move your finger along the edge, then black streaks will be left on your finger. Black is removed all the time, no matter how many times you do it! It is aluminum! And you can not use a lid on a ceramic pot because vapor will condense on the lid, run to the edge, run over this lip, then run down the sides and into the food. The pot is garbage!

As a side note: Some lids attempt to get around the problem with a "Drip Ridge". This theoretically should help, but I have no data.


RULERMAR.GIF, 1.6kB


RULERMAR.GIF, 1.6kB


Ran into a problem...
While out at the lake, I found that 30 mile an hour winds from off the lake would hit the right side of the RV; the side of the stove vent. The wind prevented my oven from venting. I have ran into this problem before, and all I did was nothing, but this time I am doing something about it, and it is the last time!


Flap20200124_162059.jpg, 22kB I bought a fan...
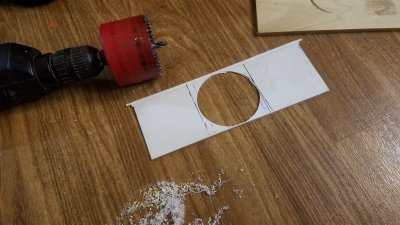
I can fit three 80mm fans across the vent. But I will use one. In the future I may go three because they fit perfectly. I will cut one hole in the center of the outside vent flapper to accommodate that one fan. I already have the strong big fan inside that vents the stove top. I do not want to duplicate its function. Instead, I will use only one fan, in the center of the flapper. It will not raise the flapper as in stove top use, but the center will always be ventilable even with the flapper down, and even with the fan not turned on. And it would not be wise for any wasps to get through the hole and between the blades, because next time I may have the fan onn. Love the sound of their little bodies being diced and spit out.

This is how it was before: no fan, and manually moving the flapper up. It worked by convection heat naturally flowing up. And it did not always work well, especially with a side wind. I could smell some combustion air. It smelled "stale". I like fresh air.

I choose not have the one fan lift the intire length of the flapper because the fan would be inefficient pulling air around in circles on the sides. I create a type of shroud by blocking the sides with the rest of the flapper.


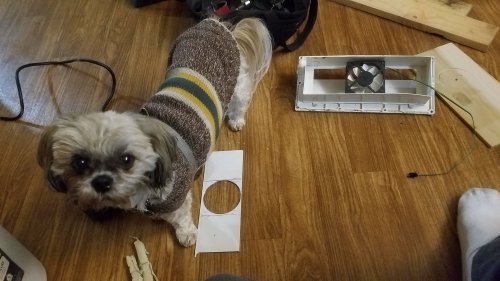
Flap20200124_163518.jpg, 34kB My helper Callie...
Her front feet are almost standing on the flapper.


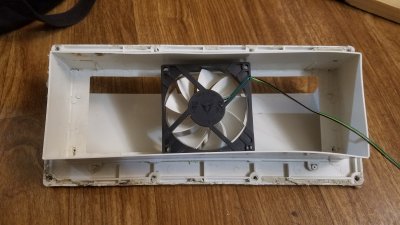
Flap20200124_163535.jpg, 21kB This is how a single fan will be placed...
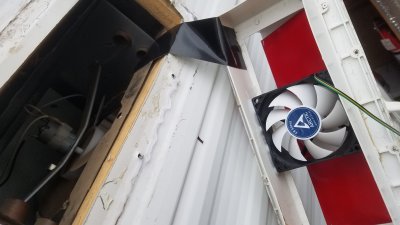

Flap20200128_094528.jpg, 19kB Here the vent assembly is hanging on the outside of the trailer by gorilla tape while I get the wires soldered and secured.
I painted the inside of the flapper "red", and it does not show unless the flapper is open. I painted the outside white to match the trailer. Before the color was "yellow". Original color 10 years ago was a white. Besides gaining an operational modification, I get the original color back.


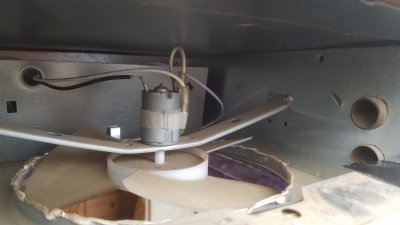
Flap20200128_094536.jpg, 14kB A look inside the vent opening. You can see the big stove top vent fan. You can see two of the copper tubes on the right. Nothing is cleaned yet.
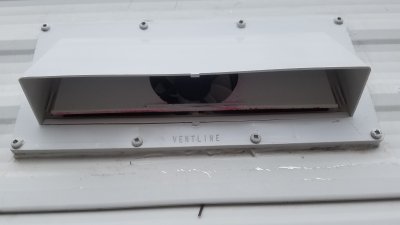

Flap20200128_121048.jpg, 11kB Here is the outside vent cover just held in place to test everything. The flapper door does not close totally shut. It hangs with a small gap. I do not think it is a problem.
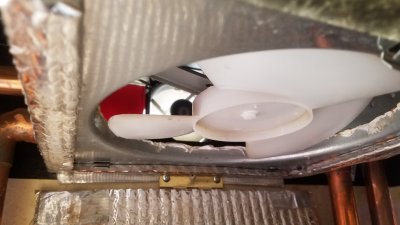

Flap20200128_121132.jpg, 19kB This view is from the top of the stove looking up through the vent hood. There is no filter, so you can see the big stove top fan. In addition, looking past the blades, you can see the newly installed small fan that will function for the oven, and also the Oven-Heater.
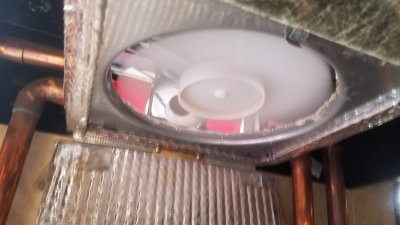

Flap20200128_121139.jpg, 18kB With the big fan turned onn, and the speed adjusted to maximum, you have a better view of the small fan. The flapper still opens almost all the way, even with a hole cut in the middle for the small fan.
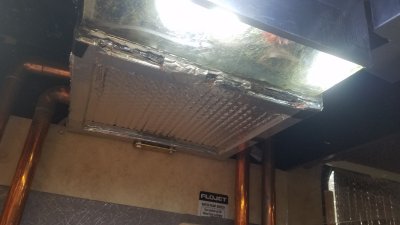

Flap20200128_121153.jpg, 15kB Here is with the screen installed and the Stove Top Blocker. Magnets hold the Blocker shut. Now oven gasses are power vented to the outside. Now I need to see if Callie is ready to go test it at that same lake. I believe she is ready to go and all packed.
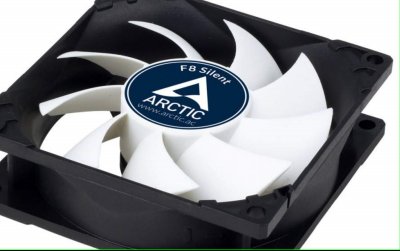

Now is not the time to be thinking about this; "After the thing is built." But what if I bought the wrong size of fan?


FlapImage.jpg, 19kB Here is the fan:
15.1 CFM 25.7 m3/Hr 0.053A@12V DC 1200 RPM Fixed Speed 3.1 x 3.1 x 1 inches
The fan has three wires. One is an RPM monitor (green) and is disconnected. Speed is controled by power supply voltage (12v).


I want to know how much volume of gasses is produced by the propane for this oven. I want to compare the volume of the fan, with no air flow resistance which is not the case, to the volume of gasses produced. In other words, how "matched" is the fan to the oven?

Here is the oven:
7100 BTU/Hr for the oven, during an ONN-Cycle.
I do not want liquid propane, or lbs propane. Converting to gas state...
1 cubic foot of propane gas contains 2,516 BTU


eq-Propane.gif, 2.4kB In the equation for the combustion of Propane, I need all reactants to be gasses.
Here is the balanced equation for Propane gas + oxygen gas to Carbon dioxide gas and water vapor.
The right side is going to have more volume due to heat, and I will ignore it for now.
The left side has six gas molecules, and the right has seven.
So the propane will expand by 7/6 times, after the products.
So the oven produces 7100 BTU/Hr, or 118.3 BTU/min.
1ft3 Propane gas = 2,516 BTU. So, 118.3 BTU is 0.047 cu feet.
But that 0.047 cu ft will expand in products by 7/6 to 0.0548 cu ft.
So the oven's 118.3 BTU/M is 0.0548 CFM. (not counting heat expansion)
The fan is 15.1 CFM. (not counting flow restrictions in the four copper tubes.)
So if I have done this right, and there is no guarantee that I have, then there is no problem with the sizing of the fan.
If I have done it right, it is an understatement: 275 times overkill. Looks like I can have a lot of restriction, and still be fine. What was I worried about?
RULERBOW