index
index index
RV Maintenance
Dinette Table
The Leg Tubes


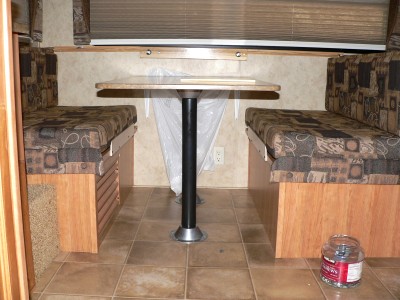
Table-Me.jpg, 35kB Finished Table
Original table had metal legs.
Supposedly, the dinette table in an RV is made to accommodate an average sized person. Simply put, this table was too damn high for me. Just like at most restaurants, I can not see what is for dinner. And forget about using a laptop! ...With your elbow well below the table top, and your fore arm painfully against the the edge, and your wrist bent and contorted above a keyboard.

The ideal solution would have been for Keystone to make adjustable leg tubes. Cheaply and easily done! Normal people should have been in the middle of the curve. But in an effort not to exclude any people on either end, the curve is "skewed". I, for one, certainly would have paid the little extra money.
Clearly, Keystone has no concept of real "RVing".


Before I began, I had a clear plan. The plan was straight foreward and self evident. I would cut the original EMT leg tubes in half. Then I would cut out a 3 inch section. The original tubes are 27.5 inches long and 2 inches diameter. Two or three inches shorter would be just fine. Then, reattach the cut sections by inserting an EMT compression coupler. Couplers fit tight with no give. There is no excuse for this not to have been the perfect solution. Obvious, direct, and requires no thinking. But that was before everything went wrong.


Coupling4.JPG, 38kB
Here is the end of one of the legs and an EMT coupler. Before cutting the tube in half, the coupler should fit over the end. It does NOT! Keystone got it wrong again! This is NOT standard EMT pipe. Someone sold Keystone off-sized pipe: just a little over 2 inch. ...And what is wrong with america! Don't cut onless you can overcome this problem.
CouplingBox4.JPG, 28kB
Box
I only included this picture because it is an example of "sad". I wanted to use metal, but now I can not.


I never imagined that things could ever ever go so wrong!


RULERMAR.GIF, 1 kB


Plan "B"...


HoleSpace4.JPG, 18kB
Drill two holes in ABS 180 degrees across from each other. Or you could drill four holes. The idea is to have "symmetry" Slowly begin increasing the gap space to yield a closed gap when the tube is completely inserted into base. Here it is about half way.
HoleBase4.JPG, 27kB
Here the black ABS is inserted completely into the base.
HoleInside4.JPG, 18kB
The black ABS is inserted completely into the base and you are looking at the underside of the base. The gap should be completely filled up, but nothing extra.
TubesFloor4.JPG, 34kB
One of the two original metal tubes is shown with the two ABS tubes.
There is a theoretical problem with the ABS tubes: They can "rock"; and due to the cone shaped ends can eventually work their way out. I have used epoxy to solve that. Plus, there is some flex to ABS. But, I really like the black color. Now, I will take everything out to the trailer and install it. This is a work in progress.
Keep you posted...

RULERMAR.GIF, 1 kB


Table-Overall.jpg, 36kB
Update...
Do not use ABS! This table "rings". If you bang one side, the hole table oscillates back and forth like a struck drum; (except it is quite). This table "shivers" and "quivers" with every push. ABS legs make a "goofy" acting table.


I have become a laughingstock to my friends, though I once called on God and he answered - a mere laughingstock now, though righteous and blameless! Those who are at ease have contempt for misfortune; as the fate of those whose feet are slipping.
Job 12
I can not let anyone see this silly thing.


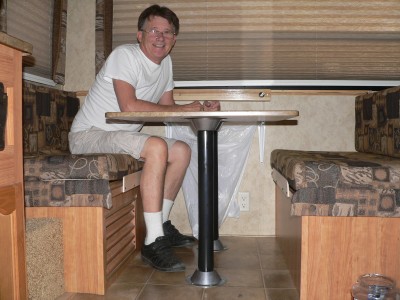
But I was able to fix the table just fine with the addition of two white braces against the wall. (You can see them in the picture.) I could find and utilize only one stud in the wall, but that is fine, even with only one "real" brace, it is solid. Solid now, but the table top can not be removed. ...No loss.

Table-Garbage80.JPG, 35kB
There was one "plus" from all these failures:
I found a place for the garbage bag.

I don't know if any RVs have ever made a place for garbage bags. Before this, we tried in vain to use any under the sink places, which were too small for a garbage can or bag. We tried everywhere; found nothing. In disparation we tried a couple of hooks under the front of the table. This worked good and was convenient, but a bag in front of your dinette looks bad!

Now there is a solution...
There is a space between the wall and the table. It is enough to have upper access to a couple of garbage bag hooks. You can see one by my thumb.

If I am really lazy, and do not want to reach under the table to put garbage in the bag, you can just shove crumbs right off the end of the table, and they will fall into the bag. My wife hates this; but I can make things disappear real quick without a rag.
RULERMAR.GIF, 1 kB


Update:

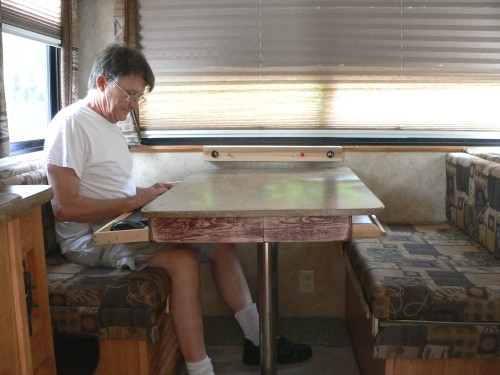
Table-Desk-Sitting.jpg, 46kB Undone the previous work of lowering the table. I am sorry that you had to read all the way to this newest part. I found it was more important to have a place for a computer keyboard.
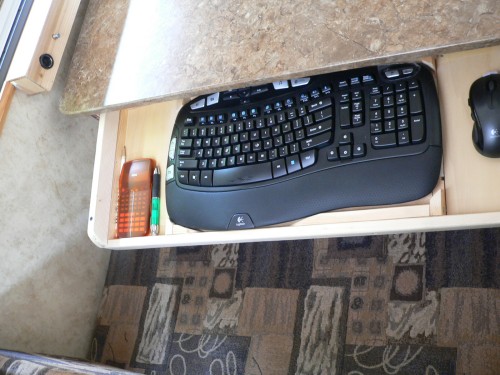
To accomplish this task, I retrieved the old steel crome legs, cleaned them off, and reinstalled. The table was once again high, but now I had room for slide-outs on both sides.
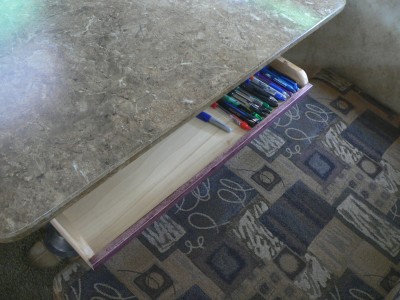
The slide outs are 4 inches below the table; Still room for my legs.

The left slide out for the keyboard extends to the edge of the table when retracted. I had no choice here do to the width of the keyboard.
But on the right side, however, there was room to indent the intire slide inward away from the edge. This gives freer access for our legs to comfortably slide under the table.

At first, I had trouble with the drawers "binding" as the slides were made of wood. But when I attempted to buy real factory metal ball bearing slides I discovered that I could not obtain an 8 inch slide. But with tight tolerances and a slick coating of car dash protectant, which is the slickest thing that I could think of, every thing slides OK now. Products such as Armorall, F21 Super Protectant, Zymol, and Black Magic will dry slick. And you know this - if you have ever accidently got some on the floor. You can easily slip and fall. I did not want a "wet" lubricant to attract dirt. And wet wood can actually grip. Nor do you want a dry lubricant that is a dry graphite. It is more missy than the sticky wet types. I have heard of people trying a hybrid product such as bar soap or candles, but I have never tried them.

When I was in college we used Vaseline on our bamboo Slide Rules. It was marginally OK only because the Vaseline did not absorb into the bamboo.

But protectants work great!
First sand the wood with a fine grain, and then spray one of these protectant products. Let dry. It is the slickest wood - ever.


Table-Desk-RKeyBoard.jpg, 56kB The keyboard and mouse are "Remote" keyboard and mouse, and do not need to be connected to a computer. However the switches under each need to be turned off before the drawer is slid back under the desk (table).
I wanted the keyboard to have a slight tilt when extended. It is not so easy with a pure slide action. You can not have a tilted keyboard under the table; It takes up too much vertical space. I had to dislocate the keyboard towards it's end of travel. Took a lot of trail and error before I got happy.


Table-Desk-Right.jpg, 35kB A nice convenient desk drawer for pencels and stuff on the other side. The slide holder, or the main body, is way back under the desk (table), therefor the drawer can be slid "way back" under out of the way. It goes further back than the edge of the table.
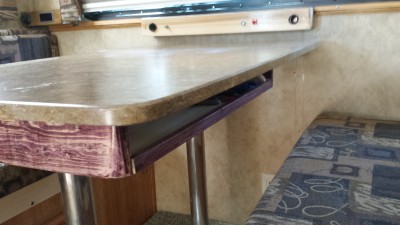

Table-Desk20150610_1530.jpg, 24kB The right side tucks away deeper.
All round all exposed corners.


The wood pattern was produced by using Deep Cherry stain on pine, and then resanding just enough to highlight the grain.
RULERMAR.GIF, 1 kB


RULERBOW