index
index index
RV Sinks
and associated projects


On a soap dispenser, make sure the quality is such that the pump never looses it's prime. Personally, I like "foaming" dispensers, and you can still use any type of soap by diluting the soap with water.

SoapThree.jpg, 24kB
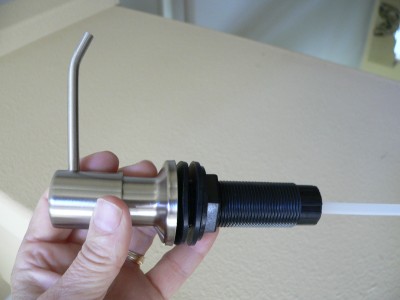
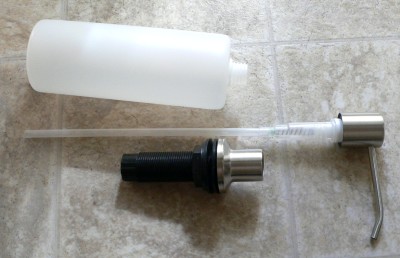
A soap dispenser comes in three parts Whether foaming or not.
SoapTwo.jpg, 19kB
The top section is the plastic pump and nozzle. The plastic pump simply slips through the collar.
But I have reservations which I have not explored:
The tiny air opifice may be a liability and may plug.
The low viscosity may lead more easily to a loss of prime.

BathSinkTop.jpg, 27kB
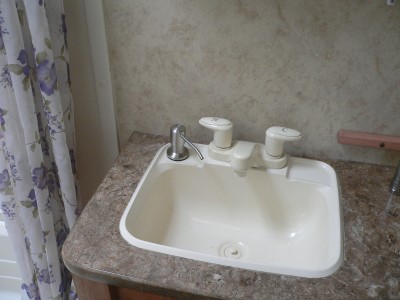
Here is the top view of a soap dispenser. This one was a stainless steel version designed for a stainless steel sink, not for an RV plastic sink. But it works just fine.

As far as I know, they don't make these things specifically for RVs. And this is one place that you have to have soap dispensers. Otherwise soap bottles turn over, spill, and strangely even leak if in an upright position. I am done with gooey messes. And I do not like camping.

Also, in an RV there is no room on any counter tops for extra bottles. Space is of a premium - At least space on top. But there is extra unused space UNDER the sink and counter tops. Perfect for soap dispensers.

Fortunately, soap dispensers are universal and very easy to install anywhere.


BathSinkTube.jpg, 41kB
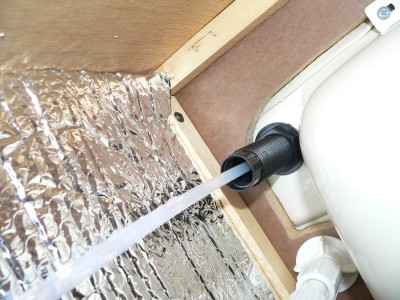
Here is the bottom of the sink, looking up.

You do not have to use the included tube. You can run extended tubing to any reservor of your choosing, in any location.


BathSinkPink.jpg, 32kB
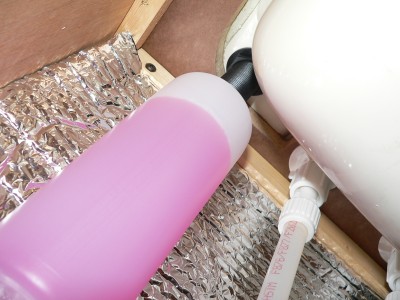
Or you can use the included tube and bottle. Slip the suction tube inside the bottle. The bottle simply screws onto the threads by hand. And you do not have to reach under the sink to unscrew the bottle if you want to refill. You can refill from the top too.

Make sure your reservor is mounted and can not tip over. Soap usually does not slosh much, but a reservor is still subject to tilt. Just to be safe, I would not fill to the top even with a good seal.


SoapKitchenTop.jpg, 29kB
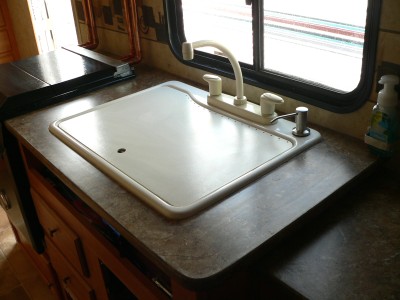
Here is another soap dispenser installed on the kitchen sink. There can be one annoying drop that is stored in the nozzle, that can leak out and unto the sink cover. It takes a long time. Never overnight. But in a week; yes. But I like the long nozzle and I will forgo it. My wife and I, and the two Woofers have a very active life style when in the RV. Sense the sink is never left alone for very long, there is never a problem with any little itsy bitsy drop.

I had to modify the sink cover with slots and drain holes. When my hands are dirty I don't have time, and I don't have enough hands, to lift the sink cover. I sawed slots and holes in the cover to allow water to drain with the cover in place. There is some splatter at full blast, but I use water sparingly. And one has to remember to wipe before food preparation.
SoapSinkBag.jpg, 27kB
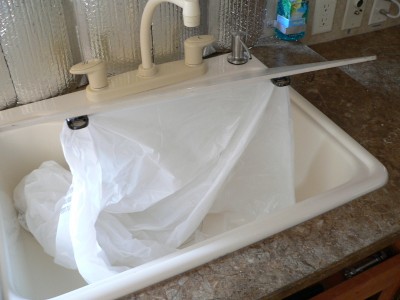
Sink cover lifted up
When I bought the Keystone, there was no place for the garbage bag. We have tried several solutions, like the front and back of the dinette. Although they work, the bags are not hidden. This newest solution involves placing two clips on the underside of the sink cover. These are paper clips that I got from Office Depot. Surface was roughed, and the clips were siliconed. The garbage bag is suspended by clips one foot apart. A tall kitchen bag has a circumference of 4 feet. One foot on a side is the optimum opening area for a square.

We have never really used the sink. I do not believe in doing dishes. Pots are ceramic, and they are simply wiped out with a paper towel. No water. Linda insists that she washed a spoon once. Maybe she did. Now, I use only plastic. When I dish out the doggies food with a plastic knife, I immediately wipe it off. When the plastic knife gets too incrusted, due to neglect or whatever, I through it away. In this day and age there is no longer a use for this big stupid sink. The woofers are washed in the bath tub. If any cloths need a byhand washing, they are done in the bathroom sink. The smaller sink makes more efficient use of water for shirts or pants. The smaller sink also makes it possible to use the sink walls as a "washing board". I would not admit to knowing what that is. But it is a corrugated brass board.

I normally place the cutting board on top of the sink cover, and have a large continuous counter top. No way can I work down in the sink anyway. I wash and peal potatoes for example, right on top of the sink cover. The water immediatly goes away, and as a bonus is strained so as not to plug the drain. A problem is that the garbage bag gets wet. Another problem is that you disturb your work on top if you have to put some garbage away. But it has been "workable".

There is no perfect solution without a total redesign of the conventional sink.


RULERMAR.GIF, 1.6kB Another problem...
The Hot Water is always "cold" initially, untill the water at the Hot Water Tank can run the gauntlet, of 20 feet of PEX, to the sink. As a consequence, RV water is waisted. On Demand Heaters are one solution; Here is another.
I tried to find a metal reservor, about a quart, but could find none. So I begin an experiment with a plastic water filter.

First lets see if this is even possible:
Specific Heat of Water is 4.18 J/gC, or Joules is gC/4.18, or (Amps)(volts)(Time)=gC/4.18
A quart is about a liter, or 1000 grams.
I would like to plan for a 50F rise: or about a 25C rise.
I should be able to get 2 or 3 amps with incandescent light bulbs. I will plan on 2 amps. And Joule energy is (amps) x (volts) x (time)
Therefor time T =gC/((4.18)(Amps)(volts))=(1000)(25)/(4.18)(2)(12)=250 sec=4 minutes.

And if I ever get a metal canister, I can safely increase the amps to 3,4,5 amps without worrying about melting the plastic.
Ya, I will take it. Because I just thought of another reason that this is important. The primary reason of course was brushing my teeth. Cold water in my WaterPick hurts my teeth. But another reason is for a warm sinus rinse. Smoke and pollen can make my sinuses plug up. Then I can not sleep. So in 4 minutes, day or night, I should have warm water. No fuss, no mess; just like a real home.


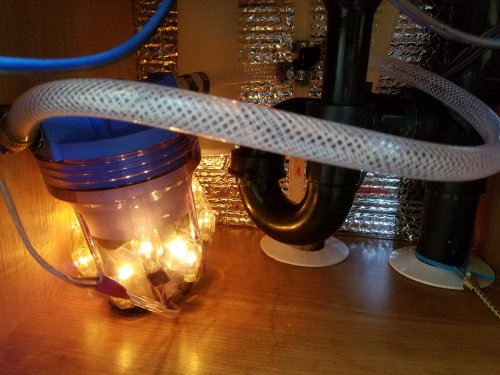
PreSinkFilter.jpg, 41kB This is scary. I have placed aluminum foil directly under all light bulbs to distribute the heat. Otherwise, a hot bulb could melt the plastic. This is scary, I can have no hot spots.
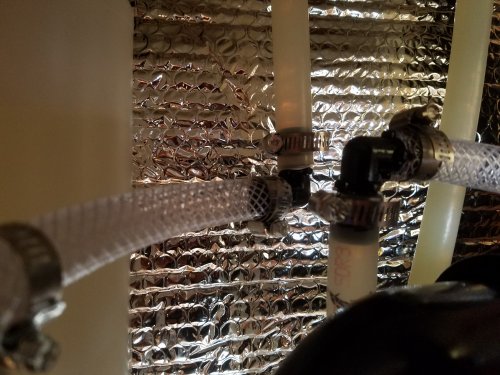
Here is a picture before insulating and incasing. The bulbs are 11 watt 12 volt wedges. Sense Reject Power can go to 20 volts, two 12s are placed in series. This also lessens the heat, and allows for better heat distribution, and allows the bulbs to last many years. I know with high power broadcast tubes, if you can reduce the filament voltage by 10%, you can almost double the life of the tube. I do not intend to be replacing bulbs any time soon, because they are soldered in by hand. A one time thing!

Going across the picture, is the inlet hose to the filter, and it can be as long as you want. Here the hose is in reinforced Vinyl.


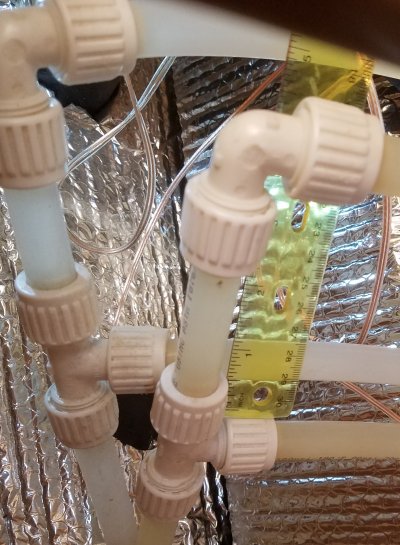
PreSinkPex.jpg, 49kB The installation is easy: just cut the PEX on the hot water side. Insert two 90 degree barbs. I had to heat both the PEX and the vinyl to make it easier to work with. The hot water side of the filter must be as short as possible, here only 4 or 5 inches, before going directly up, and into the faucet. I disconnected the PEX under the faucet to make it easier to install the fittings. Do NOT disconnect the adapter to the faucet connector. The faucet connector has a large soft rubber bushing that is forgiving and designed to be taken onn and off. Not the adapter!
The PEX connector that is used all over my RV is called the "Flair-It", and it is a good connector. But when I loosened it, I found it leaked. I have had a lot of trouble with other types of PEX connectors, especially the Crimps. Twice I have had water running out over the floor, and it was on a new trailer that was only a few weeks old. All from bad PEX connectors from the manufacturer. No excuse for it! But this FlairIt type is great and bullet proof PEX connector, it just takes a lot of force to seal properly.
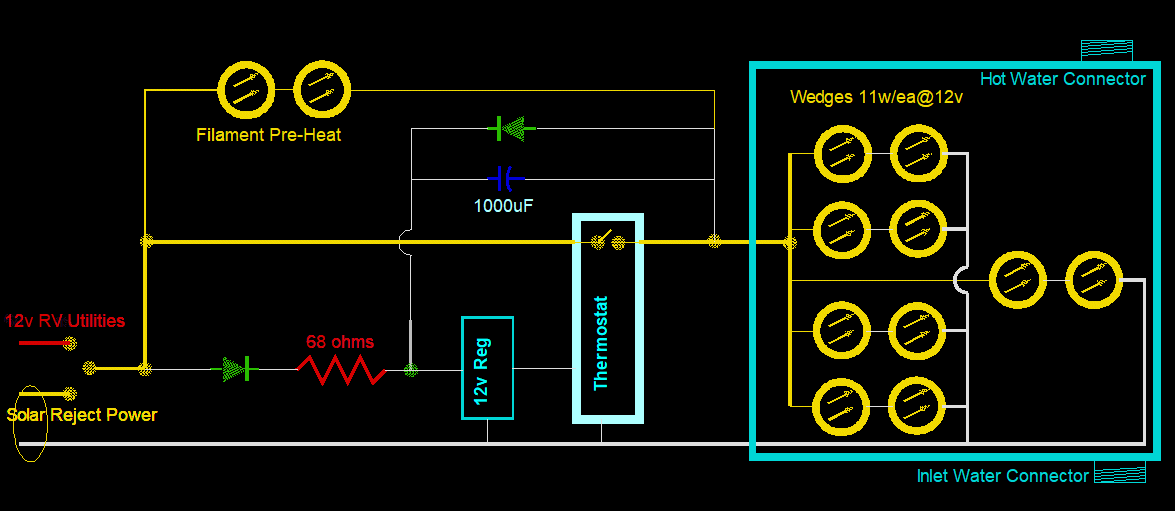
SolarPreSinkHotWater.gif, 26kB
Reject Power comes in at the left. It is available during the day, after all higher priority uses are met. At night, the switch can be thrown to Utility Power, which is from the Batteries. So, I can always heat this thing, day or night. This mode is more like the On-Demand Heaters, which are becoming more popular in homes. However, for 12 volt systems in RVs this is not possible, or at least not feasible. This is because of the huge gauge size of the wiring. High end coaches use another option: inverters and 120 volts. Then it is feasible, and in fact prefered. I tend to consider my 12 volt system as primary, and 120 volts as secondary. And I would apologize to Tesla, that it is only because of the immediacy of the battery storage source, and convenience of directly feeding from it. I use copper coated aluminum gauge 12 and gauge 14 because it is light and perfect for RVs. I maintain both worlds of RV power, 12v and 120v, because higher demands of current can only be met with AC. And low idle currents in an RV can only be met with a direct battery source.

Getting back to the schematic, there are two modes.
In both modes, Batteries or Reject, a thermostat shuts off the heat after a certain temperature.
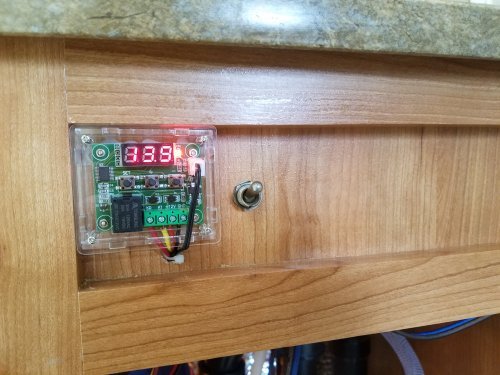
Thermostat-PreSink.jpg, 42kB Here is the Thermostat and the switch. I was going to have just a mechanical thermostat with no electronics. But for less money, under $10 bucks, you can have an electronic digital thermostat. Thought I would try it.
Just under the counter top is a recessed area. In my case, its width thickness is exactly the same as the counter indented depth. It is out of the way, and has a pretty display of the temperature. And the switch does not seem to catch on my waist clothing. So the electronic thermostat looks nicer too. I will go with anything that has pretty lights.


As you can see in the schematic, I had to use a 7812 regulator to protect the thermostat. Reject Power, can be any voltage; It is surplus. It is dirty, chopped and hashed. And changes all the time. Scrap power can be hazardous to electronics.

The 68 ohm resistor is to prevent relay chattering. The resistor develops a hysteresis voltage for energized and not energized. Reject power, especially during sunset and sunrise, can be "soft"; sense at this time the solar panels can have a higher impedance. Ya, a mechanical thermostat would need none of this feedback stuff, but then you would not have the pretty display. Also, the PreHeat lamps are to prevent the main filaments from having a darn near zero resistance when cold. The relay contacts are rated for 10 amps, and that is good for warm filaments: about 4 amps. Also, getting the lamps started from cold will drop the supply voltage excessively, drop the relay out, and the process repeats, causing relay chattering.

Filaments and girls are a lot alike: You must get a girl warmed up before anything is going to happen. A cold filament operates exactly the same as a cold girl. And all good engineering 101 students learn this straight away. How do you think I met my wife?


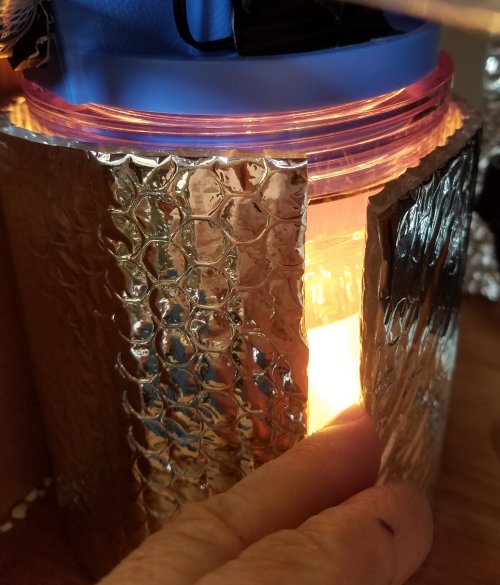
PreSinkLookIn.jpg, 56kB Anyway, trying to figure out how to insulate this thing...
In taking a peek inside, the water and white filter are all aglow. It is a shame to cover it all up, it looks like a little furnace. Perhaps it is possible to dissolve off some of the mylar, and make small windows.

I have put 3 layers of 3/8 styrofoam on the bottom. And I have cut a piece for the top. The neet thing about styrofoam is that it can be cut, carved, and shaped.

Sides will be in Reflectix with viewing windows.

...Got to see if warm water grows bacteria. There is a master filter directly from the tank that can take out chlorine. So, there is no bacterial protection here.


RULERYEL.GIF, 4.2kB This is for my RV. Your RV may be different...
PexLines-FlareIt.jpg, 56kB My PEX Lines are half inch, (10/16 inch OD, and 1/2 inch ID).
The type of PEX connector that I have allowed to stay are these FLARE-IT connectors. These are great, never had a problem. I have found PEX Crimp connectors to eventually fail. This is because in an RV there is vibration and hose movement. This puts a strain on any connection, but crimp bands in particular will loosen and fail. Combine this with the pressure rating of 50 lbs, and an RV is doomed at the factory, before it even gets out the door. There will be water leaks.

A 1/2 inch Barb will also fit inside these PEX lines. It fits somewhat loose, as it almost just drops in, and requires no insertion force. But a geared hose clamp squeezes down; just fine. I apply a little heat, the PEX becomes soft, and squeezes down just fine.


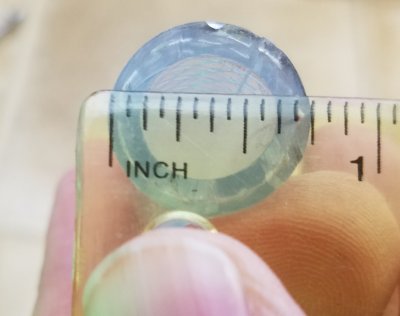
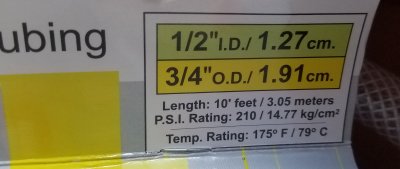
RULERYEL.GIF, 4.2kB TubingLable.jpg, 14kB
Vinyl-34.jpg, 15kB 1/2 inch barbs work out great for vinyl too. This works out well with vinyl, for both the half inch (3/4 inch OD, 1/2 inch ID) size, and also the smaller three-eights (5/8 OD 3/8 ID) size . Vinyl stretches, and either size works just fine with a 1/2 inch barb.

I have melted and burst vinyl at over 212F degrees. And it burns up, turns brown and hard. I experienced this with my hot water solar collector. Vinyl takes freezing well, but not heat.

I revisit my hose clamps periodically for tightness. To do this, I have thrown away all clamps that are not 1/4 inch heads. In addition, I have positioned all heads conveniently facing toward me. I have a handy dedicated 1/4 nut driver in a drawer. And it fits all hoses. And I go around giving all clamps a little twist test. ...And only with mild effort. Vinyl easily deforms and unfortunately seems to develop a memory of that deformation. After a couple of years, I characteristically can get a tiny tiny bit more. PEX on the other hand has a tremendous expansion and contraction coefficient but little permanent memory deformation.


RULERBOW