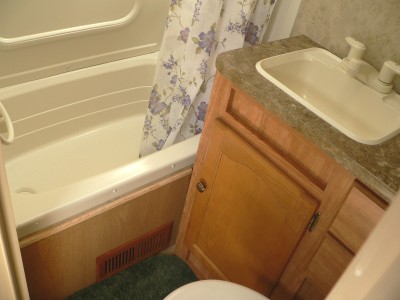
The shower has been a big problem. One has to wait for the water to get hot. While you
are waiting for the hot water to arrive, time passes as you eagerly feel the cold water
and helplessly see it running through your fingers.
Precious water is waisting away and running down a hole.
The 60 gallon Fresh Water Tank is getting less, which is not good.
And the 30 gallon Grey Water Tank is getting
fuller, which also is not good. Double "Whammy"!
The hole idea behind my RV Trailer was to
conserve water, and this is just the opposite.
I will not stand by and let this insanity continue every time I take a shower!
I had a resolve to not throw away any more perfectly good water.
So the result is yet another idea that no one
else is evidently doing. Although, I have listened to several complaints, no one is DOING anything.
If you are Off The Grid, then you also will have the same problem and may be interested in a solution.
I have made a "recirculator", or a way to reclaim the water.
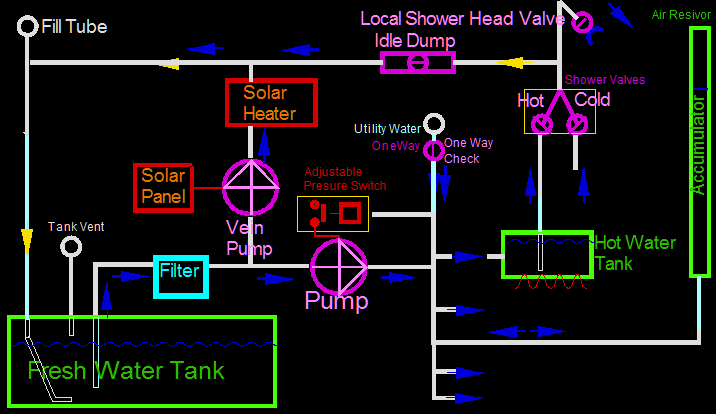
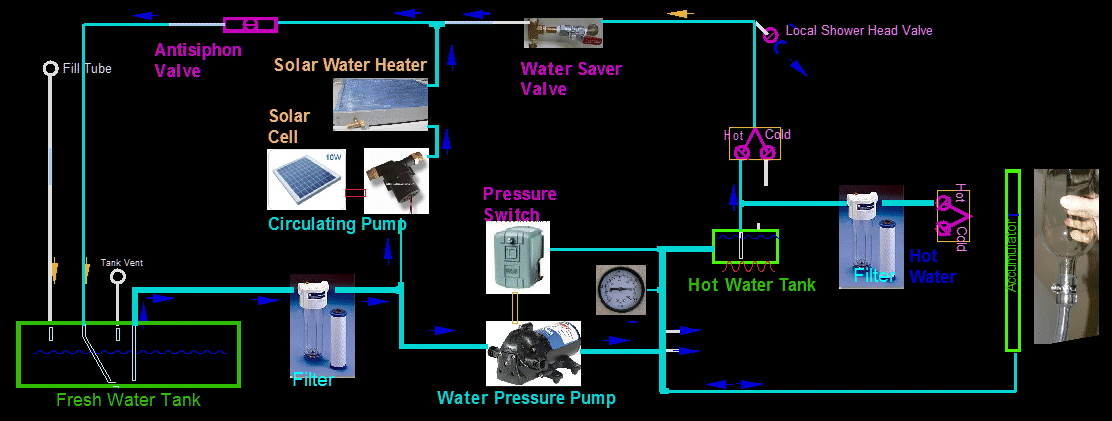
Water Diagram of RV
First, let me explain the diagram:
Fresh water is filled into the tank. An on-demand water pump starts up when the pressure of the
system drops to 20 lbs. This is controlled by a conventional after market pressure switch.
The pump pulls the water up out of the tank through a vinal hose to the input side of the pump.
The true "power" stroke of the pump is on the output side. The pump delivers 50 lb pulses of
pressure to the filter. The fresh (cold) water leaves the filter and goes into a distribution manifold.
For example, the cold water goes to bathroom sink, outside shower, kitchen faucets, and main shower.
At this point the pulsing nature of the pressure is reduced to only a couple of pounds, and has an
average pressure of 20 lbs. The pressure slowly builds to 30 lbs, and the pressure switch shuts off the
pump. The system has failed with the factory pump.
The problem is that the factory pump is rated at 50 lbs.
And the internal cut off pressure of that pump is also 50 lbs.
If the battery voltage is less than 12.0 volts,
the factory pump never reaches it's design value of 50 lbs. The pump labores indefinitely, or until
the batters are dead. A second problem with the factory setup is that 50 lbs has blown out several
factory hoses. My external pressure switch fixed all that.
If you are connected to Park water (I have labeled it Utility Water), that pressurized water comes into the manifold from outside
the trailer at this point.
The cold water water also goes to the hot water tank as you can see. Above the tank, I have shown the
hot and cold shower valves of the main shower.
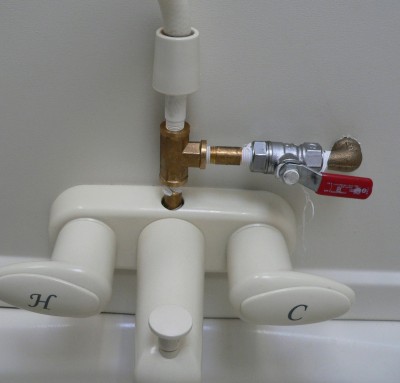
At Colliers Hardware I got this 1/4 inch Lever Ball Valve.
I also went to Home Depot and Osh, but nobody else had anything this small.
The result of this modification is that now adjusting hot and cold is done with no waist of water.
You should use copper or brass fittings so that your hand can feel the temperature of the water.
When the temperature stabilizes and the brass feels perfect, you can turn the ball valve to off and the
water will appear at the shower head/wand.
All of the water that you used to get the temperature "right" is not lost.
The water simple went back around to the fill tube.
Other purposes:
If the RV is not going to be occupied, and if it is going to be sub zero nights,
you can send water around and around for 10 minutes and
substantially heat the intire fresh water tank and many water lines too.
That is not all:
You can resend water through the filter multiple times just to have cleaner water.
There are so many things that you can do with this...
For example, any time that you want to do
maintenance on the water system and you do not want to drain water,
either unto the ground or into the grey tank,
then this valve is the perfect solution.
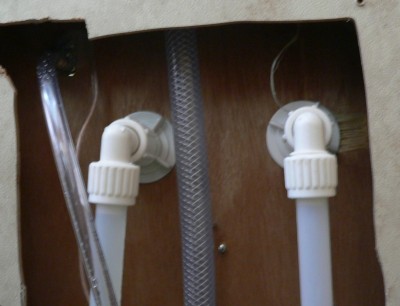
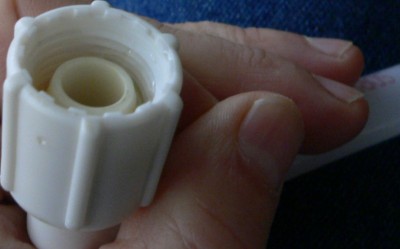
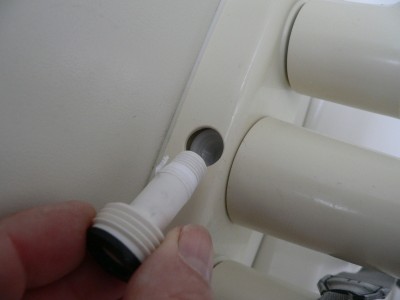
You may have different valves, but I lucked out. The nylon stem simply unscrews.
I simply unscrewed it, reused it on top of a tee. And placed the shower wand back on the stem
as it was originally.
Now I come to a frustrating part: the damn spout...
I have all the other pieces of this project not leaking a single drop.
Everything else is perfect.
But not the spout! Like most spout valves,
when you pull up on the rod, water is applied to the shower and not the tub.
That part of the operation works ok.
However, when in the shower position, water leaks from the spout.
Even "normal" operation will not work at all in an RV!
Every time I take a shower I figure I am loosing about a quart from this leaky spout.
My house shower leaks too, but conservation of water does not seem to be a problem in residential buildings.
All spouts leak a little, but not this bad. And this one is in my RV!
Also, at my house there is not as high of a pressure specifically at the spout because the shower head
is higher volume. My wife likes lots of water from the shower head; keeps her happy.
I modified the RV head for less volume, which gives full pressure at the valves.
I have already received complaints about this miserly flow, not to mention a much finer spray.
And, now I have one more problem from it.
To stop the leak, I have tried inserting shims along the valve path.
The procedure did not work.
I tried putting more pressure on the rubber gate.
It did not work. I tried and tried. Nothing worked.
Out of desperation I filled the spout with silicone. Totally filled it!
Admittedly a drastic solution,
but it does work indeed, and gives a terrific feeling of complete satisfaction.
The down side is that the tub can no longer be filled from the spout.
It now must be filled with the shower wand.
I don't use the tub anyway; It uses gallons and gallons
of water.
My wife likes to only take baths, and fill the tube with that spout.
I fear, sooner or later, I am sure that I will hear about this little aspect of the
modification from my wife. I will try as long as I can to keep it a secret.
When using my water recirculation modification,
the accumulator can be easily recharged, and you do not loose any water at all in the
process. I got two stones with one bird!
Also, no more waisted water when adjusting hot and cold nobs.
Been making changes...
Also, I have thought of a name for my invention: the "Idle Dump".
or
"the Idle Reclaimer", or the "water saver".
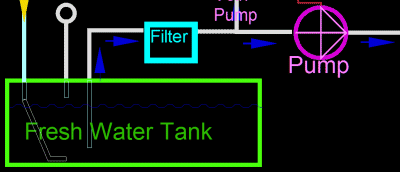
I moved the water filter from the output side of the pump to the input side.
Originally, this is the way that I wanted to install the filter,
but opinions got in the way. And when I discussed it with
the manufacturer, they did not know for sure if it would work, and said that a filter is not put on
the input side.
But now I finally have it the way that I want it: the filter on the input side!
... and it DOES work.
Filter can not leak water.
The fresh water tank is continually cleaned. ...As long as there is sun.
This is so simple! Instead of spending days dropping the fresh water tank,
and cutting a hole to insert another hose, use this
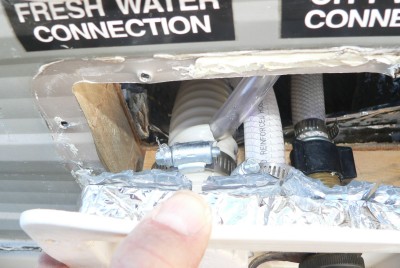
simple way. Insert a hose inside the Fill tube. It goes to the fresh water tank; Trust me!
Pre measure enough hose to make sure it goes to the BOTTOM of the tank. I am using 3/8 Vinal
inside the fill tube to make sure that it does not obstruct the flow of fill water.
I had to cut a slot to the hole because with just a hole, feeding was a huge problem.
To feed the small hose down through the larger from the end is a lot easier, Then slide
the hose along the cut slot to it's home in the hole.
In the picture, I have not siliconed the slot yet. Also, I have not removed the
"City Water Hookup" yet. I have never used this connection, not even once. I see no reason
to have it.
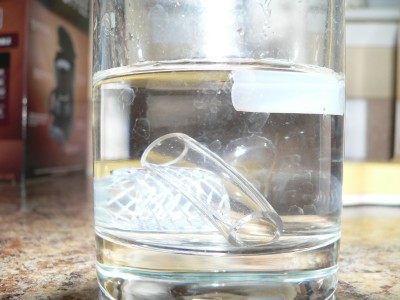
Here is a glass of water with remnants of three hose samples: PEX, and two types of vinal.
The hose that is chosen to go inside the fresh water tank must sink to the bottom.
PEX will not work because it does not sink.
Also of concern are health issues.
Braided Vinyl seems ok for not leaching lead, FDA food grade.
The clear vinyl is described as Non-toxic, and for use in potable water under low pressure.
Unlike vinyl, PEX has a clear history of being OK.
All of these tubings are sold at OSH and HomeDepot.
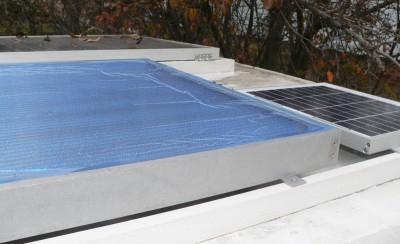
I purchased a small, 2ft by 2ft, Hot Water Solar Heating Panel and a 15Watt
dedicated Electrical Solar Panel
from BHA Solar.
In the picture, the Water Panel still has the new blue protective wrap on it.
Later, when I am not admiring it, I will take it off.
Water from the well is at 62.5F Degrees.
Initial water temperature of the 60 gallon tank is 62.5F degrees.
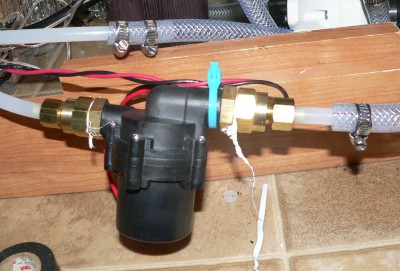
Water from the pump (foreground) flows to the left in the PEX tubing,
and up to the Hot Water Panel. The water, now hot,
flows down from the roof in the other PEX, being side by side.
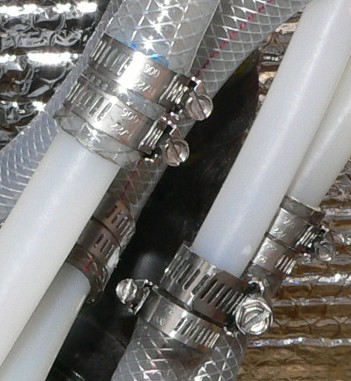
The hot water, flowing to the right, transfers from PEX tubing to Vinal tubing.
Here is a neat way to connect 1/4 inch PEX to 3/8 Vinal.
Just insert one inside the other and clamp.
Of course, in this application, there is no real pressure to speak of.
But I have used the same technique to transform 1/2 PEX to 1/2 Vinal, under 50 lbs pressure.
It works great!
This works because the PEX is hard and is the inside hose.
Update:
It does not work that good...
While the trailer had been sitting idle for a couple of weeks, one of the pex hoses pulled out.
Water went everywhere. The pex had pulled totally out during the cool night.
I got to the problem withen a few hours.
By the time that I had arrived, most of the water had exited the floor area by going down
the floor hole that the pex lines had come up through.
The water then went through the fiberglass insulation below the floor.
Under the trailer, I lay on my back looking for the missing water.
The water was pooled in the belly fabric, in an area between it's supports.
The belly fabric was seriously bowed down from the water weight.
And I could push the bulge
back up, and tell it was full of water. The bulge was heavy like water, and would migrate
around like water. There it was. I took a knife and lacerated the bulge in the center.
Water came pouring out, and gushed all over the ground. My arm was totally soaked,
and the water just barely missed my head.
After a couple of minutes, the water continued to drip as I widened the cut to view
the damage. Above the wet insulation all wood was dry. What a relief! I widened the cuts to allow
air to dry out the under area.

Anyway, here is the problem:
Vinal deforms over time. Originally I had so much confidence that I had only one clamp. And that
one clamp was VERY loose. Originally that clamp was tight. I then checked all other vinal type
connections; all were loose. All of them! So now I have two clamps on all vinal connections,
and plan on periodically revisiting continually.
This is a recirculation vein pump. It only has 9 ft head pressure and no pull vacuum.
Here is the head pressure from 8 ft of hose from floor to roof.
If there is no air lock at the pump, theoretically I should have one foot of head to spare.
Well actually, that is not accurate. I forgot about the "below the floor" and also to the
bottom of the tank. But even with 10 feet of head,
it still does not matter because it is a closed system with zero head pressure.
And at 3 or 4 lbs of max pumping pressure in this system, I need not worry about bursting connections.
This system is normally isolated from the main pumping system (31 lbs max).
To get this pump out of air lock, I had to initially blast water in the reverse direction
from the Idle Dump Valve. That is another purpose incorporated in the original design.
When the valve is opened, partially pinch off the vinal tube that goes into the fill tube
with your fingers. Then, a lot of water flows in the opposite direction up to the roof
through the hot water panel,
then down through the circulating pump in the reverse direction; taking all the air out of the
system. Even though I planned on this feature, I don't plan on needing it again for years.
Well actually, if during storage the temperature is going to be below freezing,
then the solar panel may need to be drained. It is quickly and easily done:
Turn off the both pumps, and turn on the Idle Dump valve, and leave it on.
Air will be introduced in the panel from imperfect shut off of the shower wand.
Cyphoning action will eventually drain all water back through the pump and filter, in reverse direction, into
the tank. This saves work in not having to go up on the roof and opening a fitting cap.
I designed and built a different way of freeze protection than "draining the system" when I lived in Cohasset
at 3500 ft elevation.
There I used coils of black
PVC pipe on top of a trailer house.
Both propane and solar shared the same 30 gallon house hot water tank.
I designed and built electronics that would circulate
hot water, from the house hot water tank, to the roof.
The roof water temperature would return to above
freezing in 10 to 15 seconds, and the pump would shut off. 10 minutes, or so, would pass before the
roof temperature would again approach freezing (actually 33F degrees) and the pump would again
turn on. My homemade solar hot water system in Cohasset ran for well over 5 years, and never once froze.
I was trading propane fuel to not have my system freeze.
Still not ready to take a shower yet!
Gota get rid of the old stiff plastic shower curtain. The old shower curtain was not
supple and stuck to my solders. I do not want anything sticking to me when I am
taking a shower; I don't feel clean.
This curtain is a "fabric" and is a water proof woven cloth.
Got it at JCPennies.
Still not ready to take a shower...
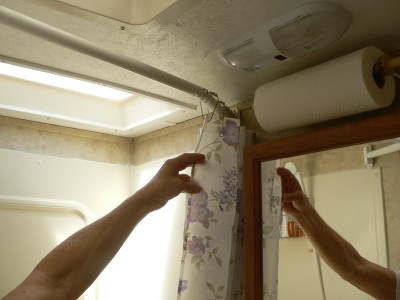
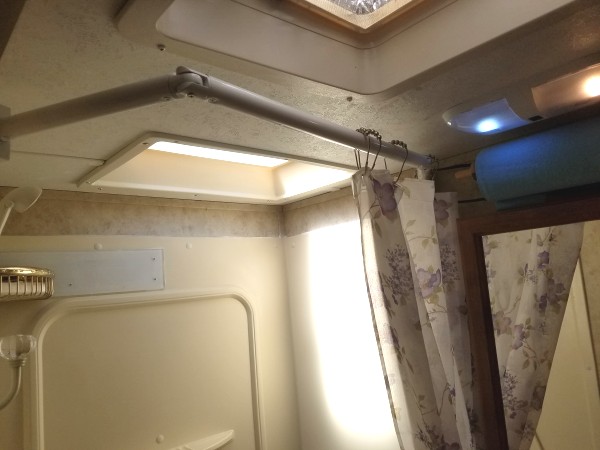
I bought this "articulated" shower rod.
It has four joints and four sections to swing out away from
your solders.
A foot more of clearance seems like miles. It is like it is not there.
Huge, huge difference!
Also, when not in use can be swung to the inside, and allows dripping
swim suits to hang over the inside of the tub.
Or, I may be able to dry clothes here too, just open the nearby vent.
This thing is great! Made by Stromberg.
After an hour on the road, the curtain will be unfurled. It never puts itself away.
No, it will do the opposite of what you want.
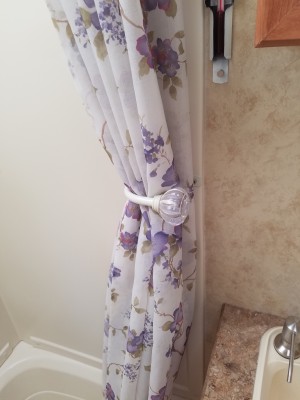
So, to fix the problem, install a curtain holder.
Being an engineer, I could have used a high tech magnetic holder.
But these take too much effort.
This, however is easy. Not too much more than just throwing the curtain open.
After a shower, something that you would do anyway.
And Linda says it looks better too.
The big glass door-nob-thing does not turn, and helps the slick curtain to slide in.
Linda says it is to look at.
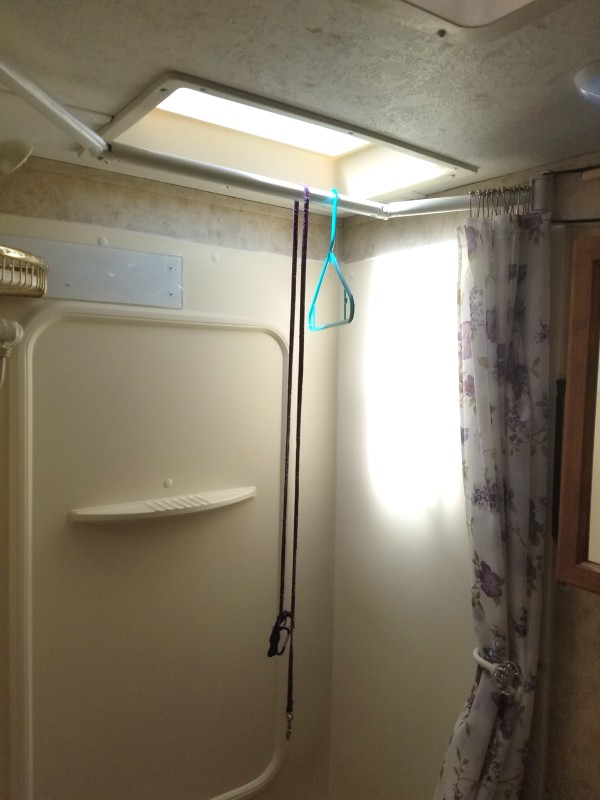
With the Articulated shower Curtain Rod in the IN position, I am drying a dog leash over the tub.
Articulated shower Curtain Rod in OUT position.
You do not want to stay in Northern California very long: here the temperature is over 100 degrees.
I am getting the job completed just in time to get out of here.
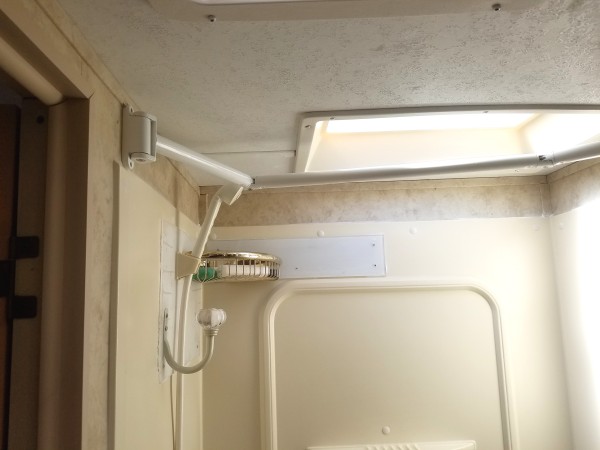
I had two curtain holders that came in the mail. One holds the curtain.
For the second one, I turned it vertical, and I choose to address another problem of no place to put the wet wash cloth.
I do not like the rag drooped over an unused facet. It looks bad. Here is a place for a wet rag.
And it is strong enough for another purpose...
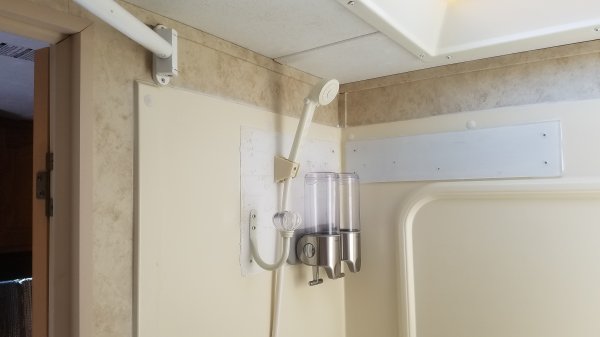
In RV showers, the walls are cheap and will not support any weight.
That is why I have sheets of plastic under anything mounted to the cheap plastic stall walls.
It adds strength to the shower wand, corner soap holder, and the washcloth hook.
I have not tested the Stromberg arm, but I think it will support my weight.
If you slip, you will probably need less than your body weight for added support anyway.
The bath rag mount is another place to grab in an emergency.
It is fairly strong, as it has both screws into an underlying light support stud.
It will bend, but should support a couple of hundred pounds, not that I weigh that much.
I don't use a wash cloth myself. I just think of uses for things that come in the mail.
Linda uses one, and as a good engineer, I will keep her happy.
I finally fixed another problem:
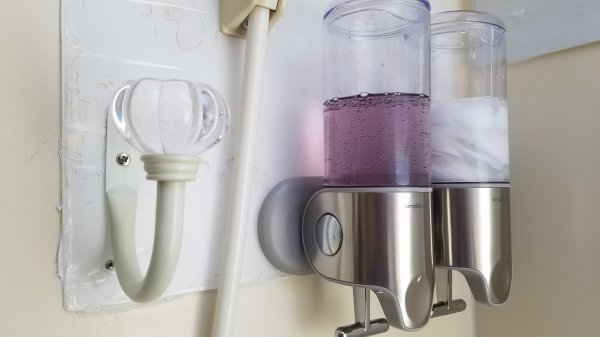
Added a set of soap dispensers. One for shampoo, and one for body wash.
The problem was I used to have assorted small bottles of soap and shampoo
in the gold wire cage mesh mounted in the corner.
They would tip over and leak. They were notoriously messy.
Also, if you have water in your eyes, it is next to impossible to get some more soap.
First of all, you only have one eye open.
And then, you have to search around and try to get a bottle open.
Even if you manage to find and get one open, the bottle is still an unknown bottle,
because you can not read the damn thing.
After you decide to go for it, and half some of that, you can not feel what is in your hand, if anything.
So many times, I do not know if I have a big hand full, or a smidgen.
Also, when you leave for another town, how full are these bottles? RVing is supposed to be fun, not a gamble.
I have the solution... First, I removed the corner cage shelf.
And then mounted these dispensers... And that solved that!
The one on the right is shampoo, and it is a mixture of a white antidrandruff shampoo and a Green Tea shampoo;
All swirled together without mixing very well. Kinda pretty.
You judge the amount of dispensed soap by the amount of pull distance.
A full pull is a lot of soap. For me, about a quarter pull is about right.
In an RV, you must keep soap a little on the meager side,
or else you will spend unnecessary time washing it out, and waisting water.
And no way around that one: You WILL use more water washing out soap!
Solved another problem...
The shower head gave too much water when the nobs where full onn. No one can move that fast, a splishing and splashing!
I strategically filled the holes of the hand wand with glue.
Now there is time to wash out the soap.
Under well placed, pleasant warm water, you have all the time in the world.
Another problem...
The hot water is way too hot!
The Keystone trailer has an inappropriate thermostat.
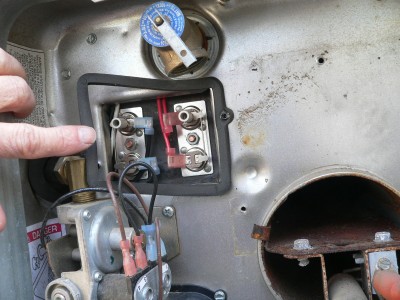
The Keystone hot water heater has a non adjustable 130F degree thermostat.
The thermostat has a 20F degree hysteresis and shuts off at 110F degrees.
Suburban has a "cosmetic" solution with a warning label stating that 130F degrees will result in
immediate burning of skin and possibly death.
The regulatory advisory for the industry expressly forbids such a high temperature.
And a mere warning label is hardly enough.
The agency denotes the only time such a high temperature can be used is if there exists a second inline
"mixing" regulator with a setting of 120F (49C) or less. The regulations are ASSE 1016 and CSA B125.1.
The agency sites incidents of thermal shock and skin burning especially with young children and the elderly.
My modification helps alleviate this problem. Although the brass fittings can still get quite hot to the touch, and
they do indeed have to be touched to get the water temperature correct. But you can let go!
Water flows through the brass fittings, but it is not waisted; The water flows back to the 60 gal fresh water tank.
Water flows around and around until the temperature is just right, and then the water is diverted to the wand.
Neither my wife, nor I will probably get burned in the shower anymore, but Woofie is still in danger when using the outside shower.
Before the dog can come inside at least the paws have to be washed, if not the whole body from head to tail.
The outside shower is not influenced with my device, and too hot and too cold still remains a problem here.
I have a suburban heater and there are no adjustable thermostats available anywhere on the market;
as there are for the Atwood heater.
Housing Code for hot water is in place for Housing; not so for RVs. RVs have little safety codes.
For example, for Housing, to keep microbes down, sink temperatures are to be at 120 degrees, or slightly higher;
But not over 130 degrees. By code, the shower should be between 110 degrees and 112 degrees.
This is to prevent dangerous, or life threatening, scalding. None of these codes are in place for an RV.
A "work around" to this common problem was found by a nice retired couple traveling with their grand daughter.
Not only did they care about the granddaughter but also the love intrusted to them by the parents.
The granddad deliberately opened
one of the two water bypass valves around the heater - just a little - adding in a little cold water to drop the "mix" to below 120F degrees.
Now the little girl can turn the hot totally on, and have the temperature only
uncomfortable warm; making her safe while she learns the mechanics of showering.
Resourcefulness and caring from a parent overcomes stupidity and negligence from a manufacturer.
RVers are generally nice considerate people.
I will later show you my direct approach to correct the problem.
Safety is one thing, but another issue is a monitary one: Why throw away gas with a high thermostat?
The inefficiency of a high temperature goes up as approximately the square of the temperature.
It is not linear! So just a little reduction of
the thermostat temperature setting results in a disproportionately large savings.
I also could probably argue that wear and tear is reduced too, and longevity of the heater is extended
with a reduced operating temperature. Also I don't have to worry about damaging my water filter which, against the
manufacturers warning, I moved from the cold water side, and placed
in the hot water side. 'Cause that is where I want it!
I excercise more personal care and thought in RV design than any RV manufacturer.
Which of you fathers, if your son asks for a fish, will give him a snake instead?
Luke 11:11
As I make changes to my RV, one thing is crystal clear:
RV manufacturers do not understand the mechanics of RV life,
nor do they care about the welfare of people.
And every "person" that I have met in an RV has a name; a concept that eludes manufactures.
Hot Water Thermostat - Solved!
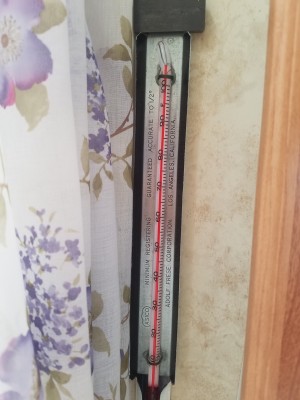
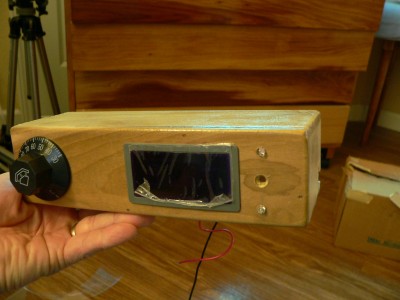
This meter is not for everyone.
After downloading the manual, I see there are some serious design problems...
For one, to change from Farenheit to Centigrade you must turn on and off the light in the room.
Therefore, if the light in the room changes the display can accidently change to the opposite format.
I had not had this meter running for more than a few hours, and this very thing happened: It switched own its own, for no good reason.
And I knew before hand that it could theoretically happen!
Stupid idea. Why did they not just put a switch on it?
The manufacturer must use children, which is illegal.
Also, for another problem, the update speed is several seconds. I don't like waiting.
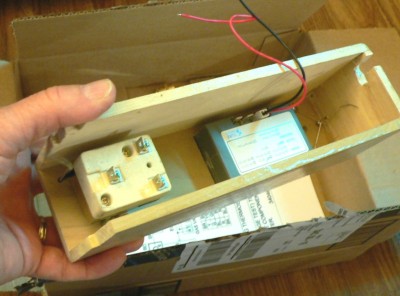
Here is the back of the box.
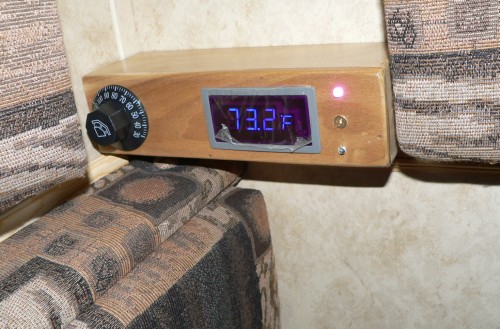
The thermostat and the temperature meter have only been "placed".
The wiring still needs to be connected.
The shipping protective cover is still on the meter face.
The thermostat seems to have about a 25 degree hysteresis between the "clicks",
as felt by moving the nob back and forth.
I don't like to see that much "slop", but, then again, I only paid $6 dollars for the
thing...
The center hole is for a mounting screw.
The top LED is a high intensity LED that indicates when the hot water tank is being heated.
The bottom LED is a high intensity Green and indicates when the hot water tank is
not being heated. If both LEDs are off the Hot Water Heat is disabled, but
the temperature display may still read. I usually leave the temperature display on
all day. It uses little electricity.
Electronically, everything checks out. Now to finish the install...
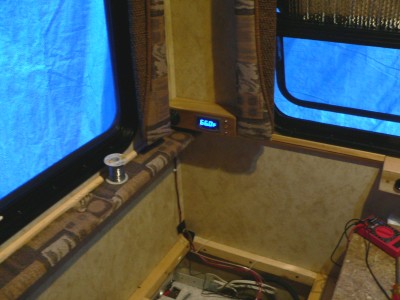
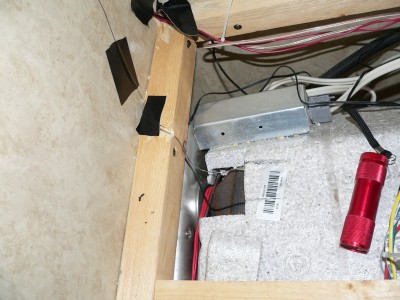
You can see why I had to place the thermostat at the extreme end of the box.
The capillary tube will just barley reach down to the tank. And the capillary tube,
as well as the other wiring must follow the corner. Also, with the nob close to the
wall, it will be less likely to be accidently bumped and changed by anyone sitting on
the sofa.
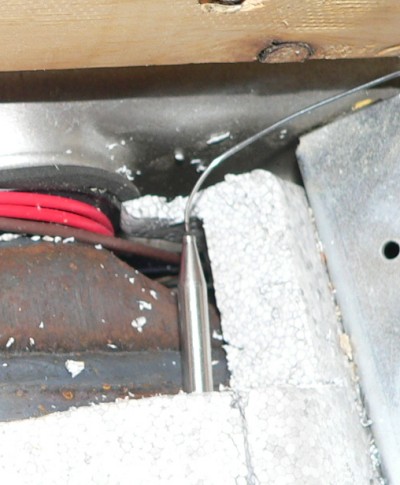
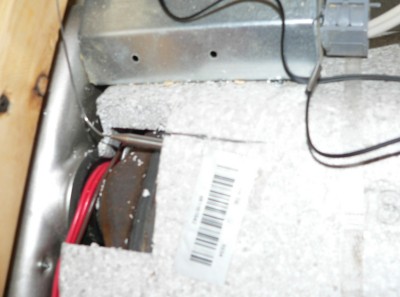
I cut a small section out of the styrofoam which will be replaced when I am done.
The thermostat uses a capillary tube. The meter uses a thermistor connected with a wire.
Both probes must be inserted under the styrofoam.
Neither probe will slip under the styrofoam without slitting the insulation.
This gives a path for the probes to follow. The probes still must fit tight against the metal tank.
Problem:
The thermostat tube is too short. It is 27 inches. Therefore I had to rout directly across
and not follow the other wires in the corner.
It will still work, just a cosmetic thing.
I placed tape over all wires to hold in the channels cut into the wood.
The sofa will set on the wood frame, and the wires and tube can not be exposed.
Couch cushions all back in place. All done.
Set the temperature to 109F degrees. Got in the shower.
Turned on my water bypass, and turned on the hot water.
Waited for my brass fittings to get warm.
Only used the Hot Water side; used no cold water mix.
Perfect! Felt so good.
Works better than I expected, because now taking a shower in an RV is pleasurable.
I can take as long as I want, because there is only one nob to adjust, and that is the
amount of flow. Just cut the flow down and relax and take as long as I want.
I find it difficult to juggle any more than two nobs.
More time is waisted going back and
forth with the stupid nobs than actually taking a shower; not to mention the discomfort.
One nob is perfect. And the temperature is perfect.
At BlackButte Lake to "test out the shower".
But this does not count! Now I must hitch-er up and take the RV to a lake to really
test out the shower.
That is just the right amount of excuse to take an RV out: to "test out the shower".
It is just like ridding my motorcycle, the reason can not be too big.
(I don't think there is a reason that is too small. Mathematically, it is open ended on the small side.)
Another problem...
While traveling to the coast, I noticed that the tank water filter was empty of water.
I still had 30 lbs water pressure, but the tank supply filter was empty of water.
I do not normally expect to see the canister totally empty nor totally full.
The filtering action is not good untill nearly full or full.
When the filter is about 7/8 full,
I have a visual indication of water flowing into the filter. This happens when ever
either pump is pumping. Nice to see the water flowing in at the top through the
clear plastic canister. You can also hear the water gurgling as a stream.
This is yet another reason that I chose to have my filter
on the input side; I can see the water flowing!
Before leaving for the coast, I had made another modification to my system:
I added another valve. It is at the top of the diagram and slightly to the left.
After the trip I know call it the "Anti Siphon" valve.
What a time for this problem to develop!
I refilled the filter to 7/8 full by the use of the newly installed valve.
It is easy to do. I just close off the valve, open the idle valve, and see the water
fill the filter canister. It fills because the water is flowing in reverse direction.
It is flowing in reverse direction through both the hot water vein pump and the filter.
The water is flowing into the canister from the central tube
which goes all the way to the bottom of the canister.
Air is displaced at the top of the canister, traveling to the tank.
There, air bubbles gurgle from the input hose inside the tank.
If I had installed the canister on the pressure side of the pump, I would be forced
to use that little red button on top of the cannister. For other people, it relieves
the pressure and expels the air. I do not need it, and wish that it was not there.
In fact, for me it could be a liability if the intake vacuum is too much:
That little red valve could inadvertantly open.
With every thing back in order, I drove another 50 miles, up hills and down hills and
around curves. When we arrived at a McDonnalds stop in Willits, I noticed the filter canister
was empty AGAIN! Now, there really is a problem; And it is no coincidence!
I did not understand just why, until
I was inside and half way through eating my hamburger:
I was travelling with 13% water capacity in my 60 gallon tank: That is about 8 gallons.
And I could see through a viewing window of the plastic tank,
that the water just covered about two inches of the bottom of the tank.
This is my "flashlight" method. Both methods require the tank to be level.
With these two methods, I know exactly how much water and weight that I have.
The little vein pump does not have enough head pressure unless the water is in a
closed system. And at the moment both ports are underwater.
But what I failed to consider is that both intake ports, with all that water sloshing back
and forth, will be exposed to pure air at times. It may be momentary in curves, or much longer
as when going either up hill or down hill. At every "slosh" a little more water syphons
out of the lines, and air goes in. The little vein pump can no longer pump water around
and around a closed loop. Instead, it has to push water 10 feet high.
...Can't do it!
The solution was easy and immediate: just close the valve while traveling.
No more problems for the rest of the trip!
Update:
I do not need the valve anymore. I have added a second vane pump in series with the first (recycling pump).
Now, I have enough head pressure to not worry about air lock.
Both receive a strong steady 12.02 volts that can be depended upon anytime.
The dedicated solar panel that used to feed the pump is no longer needed.
Power is now available rain or shine from the Coach Utility Power that everything else runs off of: 12.02 volts.
Even at night, with the tanks sloshing around,
I have the pumping strength and constantly available power to clear the air from the system.
As long as the vane pumps are in water, they can push. (They can never pull up water.)
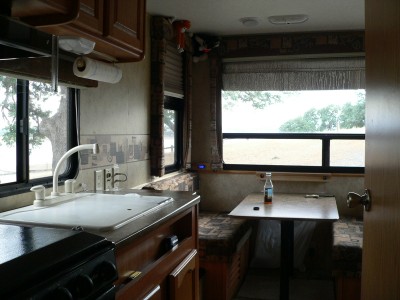
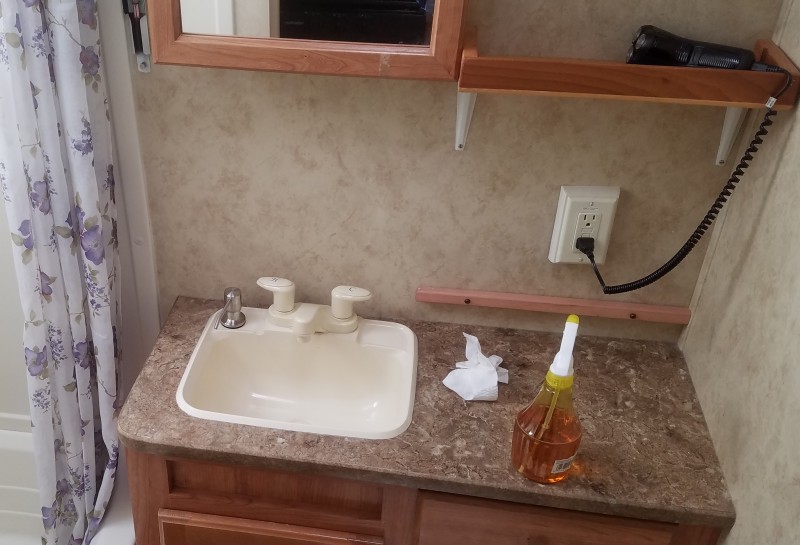
Got rid of the terrible little faucet that came with the Trailer.
The original faucet was hard to actually use: I could not get a drink without using a cup.
I could not use with the WaterPick, as there was not enough room under the faucet to fill it.
And it was difficult to find enough room to wash my hands.
And forget about hand washing any socks. The sink is pretty to look at, but has no practical use in an RV.
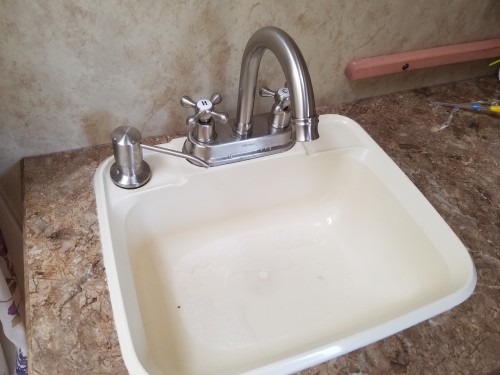
But this sink works great!
However, this one was not without huge installation problems:
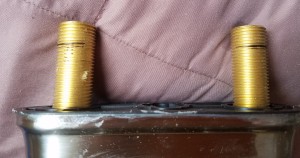
The manufacturer supplied with too short of shafts. They were saving on production costs.
After the installation, the lines leaked because the couplers needed about 1/4 inch more of threads.
The black marks are the amount of threads needed for a tight fit. And it is not there when installed.
Removed the faucet and measured the length to find it was 1/4 inch shorter than the original faucet.
Had to remove the little sink tub, and spend several hours decreasing the thickness of the counter top, as well as filing the coupler length.
But it ended well.
The new faucet...
The original toilet seat of cheap plastic cracked around bolts. Finally the hinge totally broke off on the left side.
Now, the damn thing would slip and slide around - even on level ground. You got to hang on for dear life.
I repaired it with epoxy, to only have it brake again a week later.
Before the fatal final break, there were two additional fractures in the cheap plastic.
I could buy an exact replacement for under $10 bucks. But why?
This lid only lasted me about 8 years. The plastic degrades rapidly.
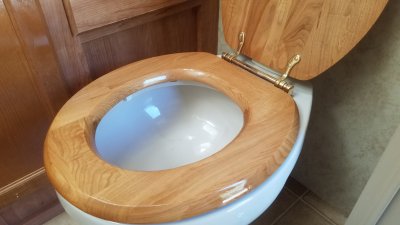
So, I purchased a "real" lid. This one is made of Oak with real brass hinges. Pretty too!
If you choose wood, you should revarnish it for good measure, otherwise moisture could penetrate wood sections or seams, and split the wood.
This is a major complaint of wood in a hot steamy enviroment.
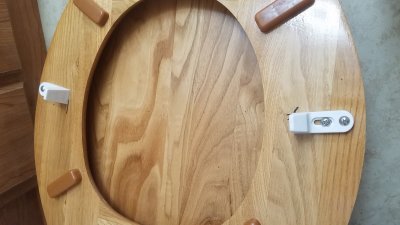
But even this real lid will not last without additional modifications.
The additional modifications are required for any lid, especially those in an RV. The problem arises with sideways force on the seat.
I am not particularly heavy, at 170 lbs. But in a closed space, like in an RV, you can not reposition your weight on the seat.
The hinges made of any material will not tolerate the side forces. Nylon bolts will not work; as they strip out, and also can never be kept tight.
Metal bolts force the fracture of the hinge itself, if not the ceramic. But there is a neat solution...
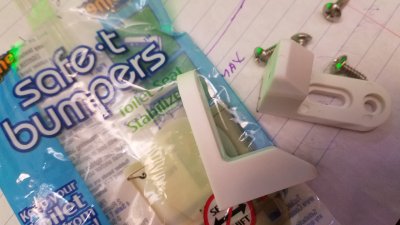
I purchased these anchor position holders, shown in white. I do not know what they are called. I was going to make my own out of wood, but they are easily purchased.
This model has a slotted adjustment for the first screw. You can adjust for no wiggle or movement. Then place the second screw. Love these things! Great invention!
No more strain on the hinges. Even if the RV is on a hill side, this thing is going to stay put.
One side is sloped or beveled because with such close tolerances,
the toilet seat is given an opportunity to automatically seat itself before the seat is all the wall down. It is guided into place.
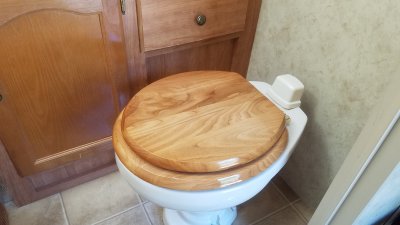
The package comes with two sets. So you could also stop any forward or backward motion.
Did not seem to be a problem for me. So I can use the second set to increase my reverence status with another RVer.
If you wanted to make your own, I suppose one could grind part of the existing bumpers down about an 1/4 inch to more snugly fit the contour of the ceramic.
This would be a "mild" solution.
But the hinge height could now be too high, and may suffer at least a hundred pounds of stress, common with cheap plastic hinges.
However, my brass hinges can accommodate different hights of the seat with no stress at all.
Or, as I was going to do: cut a couple of pieces of wood with a graduated step.
I would not use metal, as with a small piece of angle-bracket.
The ceramic boul could crack when sat on from spreading forces against the sides of the boul.
My wife likes the cover down. I do not know why. Actually, I do. Or at least a reason: the bottom drawer will not have room to open with the cover up.
Another stupid mistake from Keystone...